As a follow-up on the presentation I did at CloudBrew about Azure Static Web Apps I want to write a series of blog posts.
- Part I - Using the VS Code Extension
- Part II - Using the Astro Static Site Generator
- Part III – Deploying to multiple environments
- Part IV – Password protect your environments
- Part V – Traffic splitting
- Part VI – Authentication using pre-configured providers
- Part VII – Application configuration using staticwebapp.config.json
- Part VIII – API Configuration
- Part IX – Injecting snippets
- Part X(this post) – Custom authentication
After getting side tracked by talking about configuration, it is now time to focus back on the authentication and authorization part. I already explained that when using Static Web Apps you get 2 authentication providers out-of-the-box:
- GitHub
- Azure Active Directory (Microsoft Entra ID)
Today I want to show you how to use the OIDC provider of your choice through custom authentication. So if you want to specify your own Azure AD instance or use a 3th party identity provider like Auth0, IdentityServer, KeyCloak, … this is all perfectly possible.
Remark: Custom authentication is only supported when using the Standard plan for Azure Static Web Apps.
The advantage of using the built-in authentication providers is that it is a configuration free experience. Everything that is needed is already setup for you.
However if you want to have more control you can switch to a custom authentication provider. When using custom authentication providers, we have to make a difference between supported and unsupported authentication providers.
Using a supported authentication provider
Static Web Apps has out of the box support for some of the well known (social) identity providers like Microsoft Entra ID, Apple, Facebook, Twitter and GitHub. To use these providers, specific configuration should be added to the staticwebapps.json.config file.
I’ll show you an example using Azure AD but you can find the configuration for other providers here.
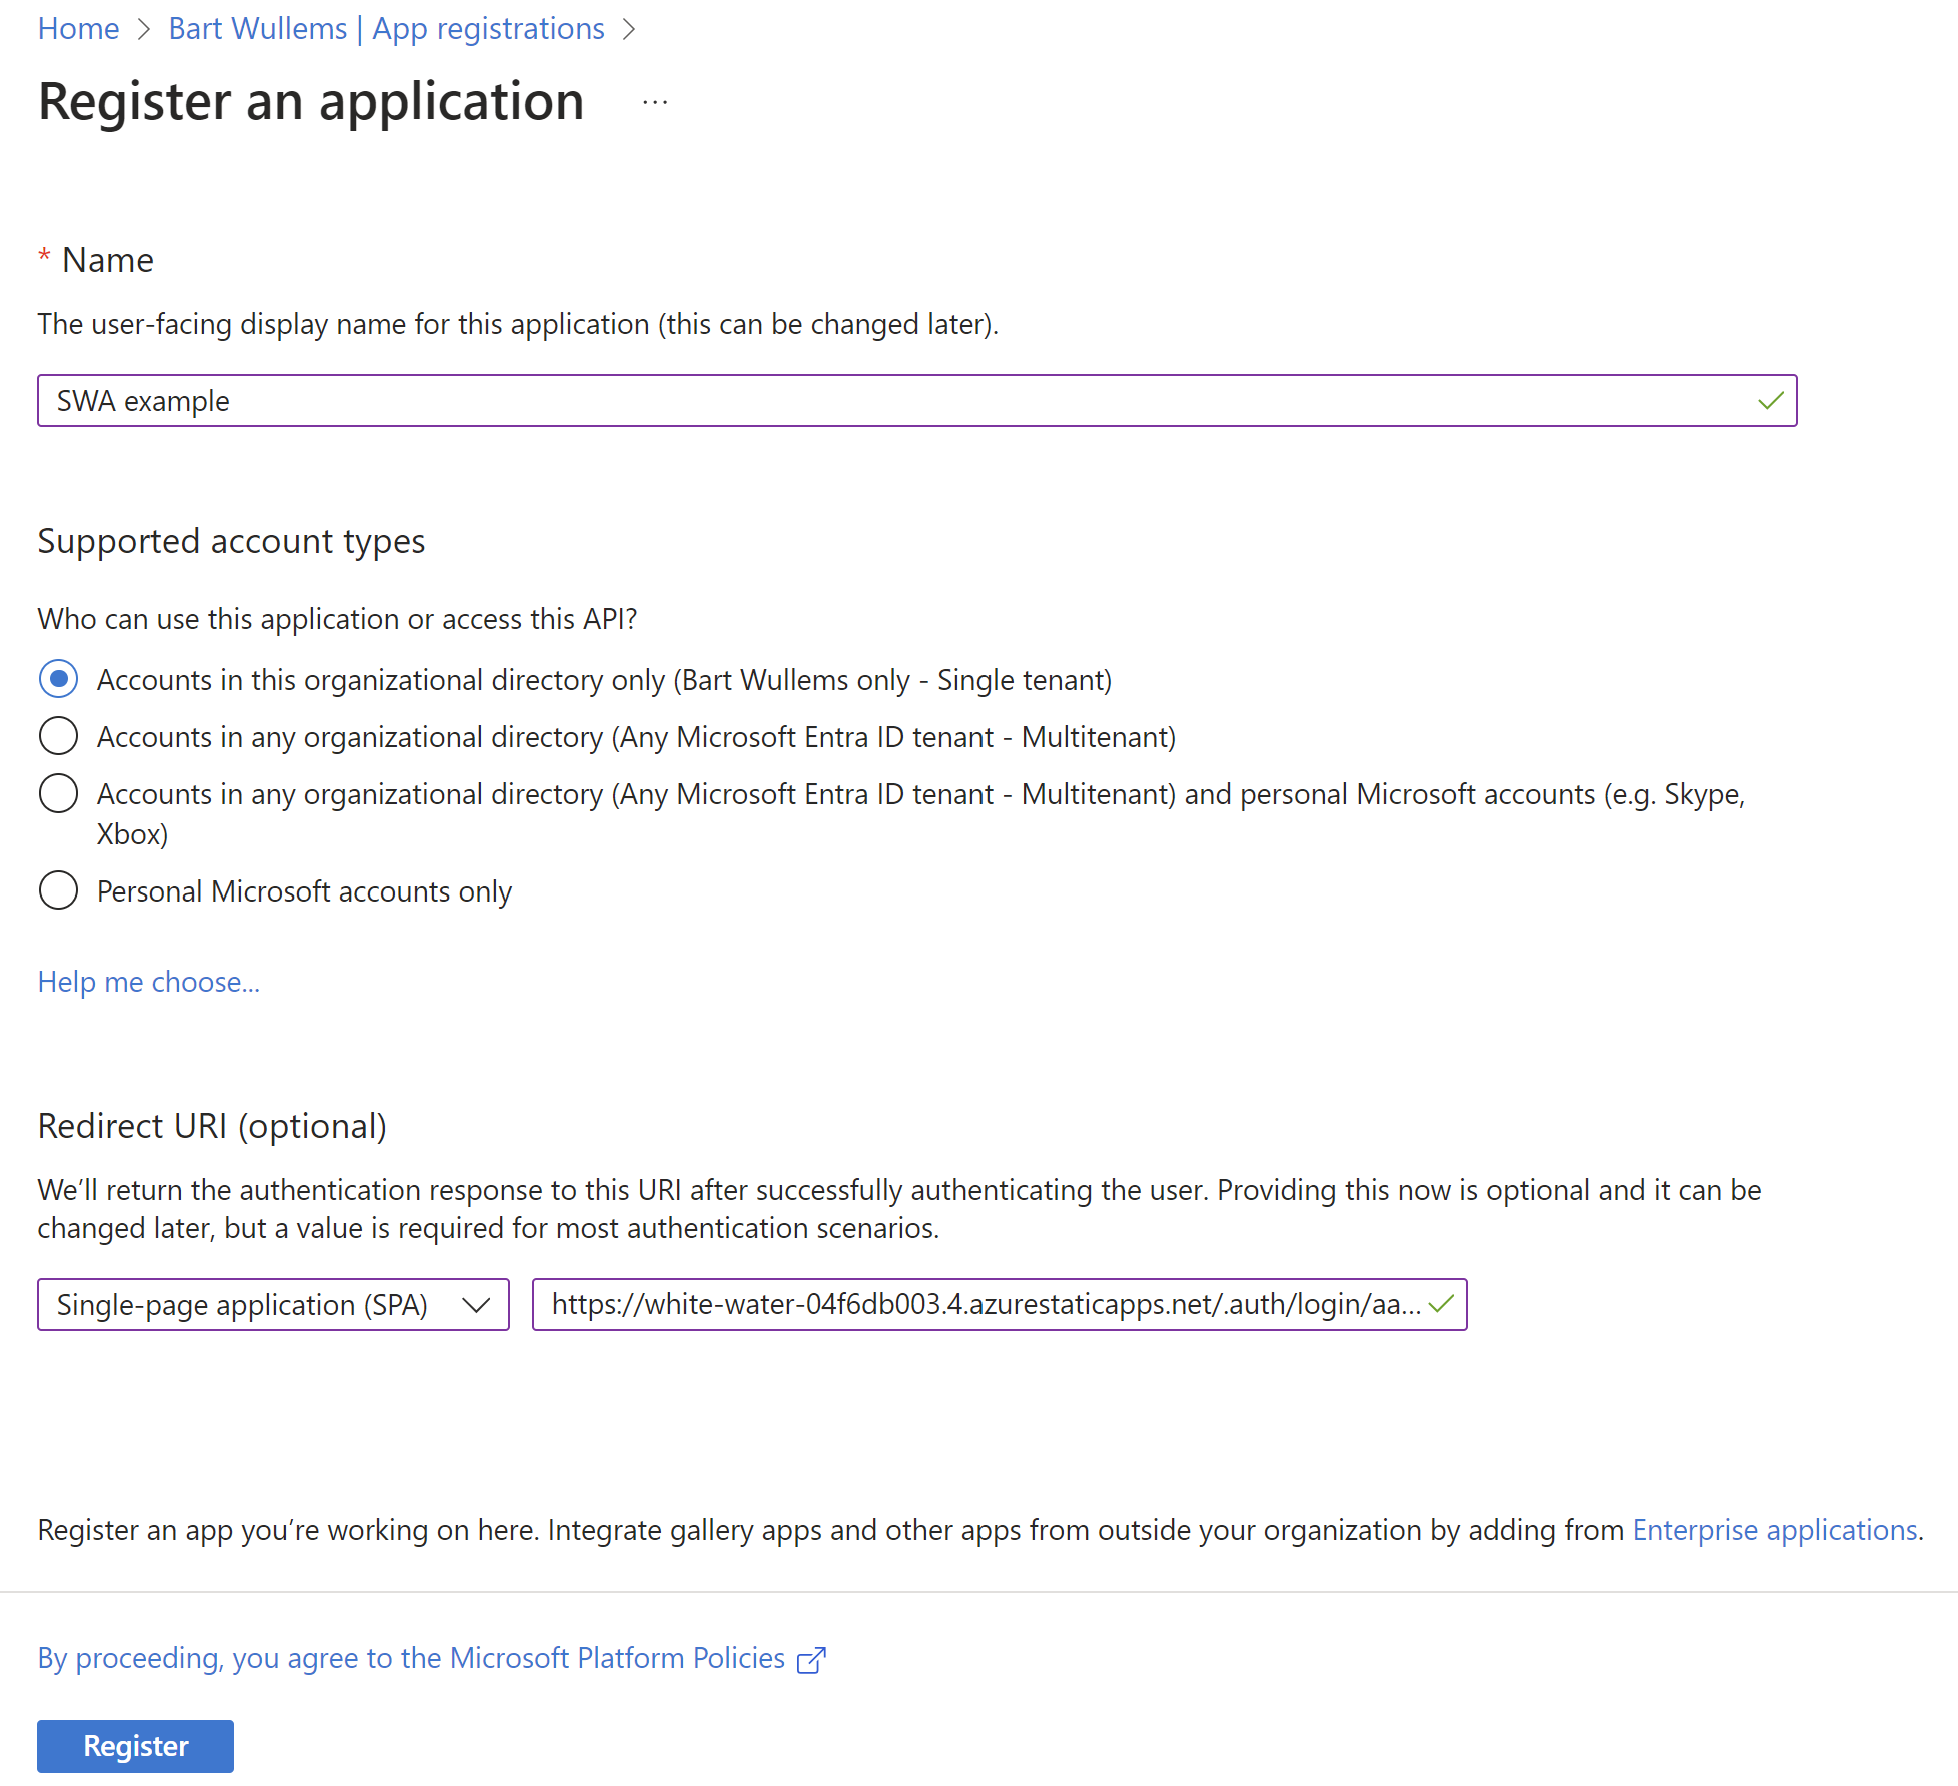
First we need to register our application in Azure AD:
- Go to your Microsoft Entra ID instance in the Azure Portal
- Click on New registration
- Enter the application details
- Choose a display name for your registration
- Specify the supported account types
- And set the redirect URI to the following uri:
- Click on Register
- Open the application registration we just created.
- Capture the Application (client) ID and Directory (tenant) ID. We’ll need it later.
- Then go to Client credentials and add a new secret. also copy the secret value.
Now we are going to update our config:
Note that we don’t have to store the secrets in the config file itself but we can specify 2 placeholders values. Azure Static Web Apps will use this value to search for a corresponding key in the application settings:
To call this provider we need to use ‘aad’ as the provider name in the URL(and not azureActiveDirectory as used inside the configuration):
Using an ‘unsupported’ authentication provider
Let me now show you the steps when using an unsupported provider. I’m using here Azure AD as well, but the steps are similar when using other providers like Auth0 or Keycloak.
First make sure that you have registered the application in the authentication provider. The steps required will differ depending on the chosen provider.
Next add the following configuration:
To call this provider we need to use the provider name we used inside our configuration:
That’s it!


