
Set the hosting environment for a .NET Core console application

ASP.NET Core has the built-in concept of an environment. This allows you to change the behavior of your application based on the detected environment. A typical example where we use this is to load different configuration values.

In your application you can access this value through the EnvironmentName property on the IHostEnvironment interface.

The Launch Profiles UI

If you want to change this environment value in Visual Studio while debugging, you can do this through the Launch Profiles UI.

To launch this window, you have 2 options:

  • Right click on your project, click on Properties.
  • Scroll down to the Debug section and click on the Open debug launch profiles ui link.

Or:

  • Click on the Dropdown arrow next to the run icon.
  • Select <Profilename> Debug Properties from the dropdown menu.

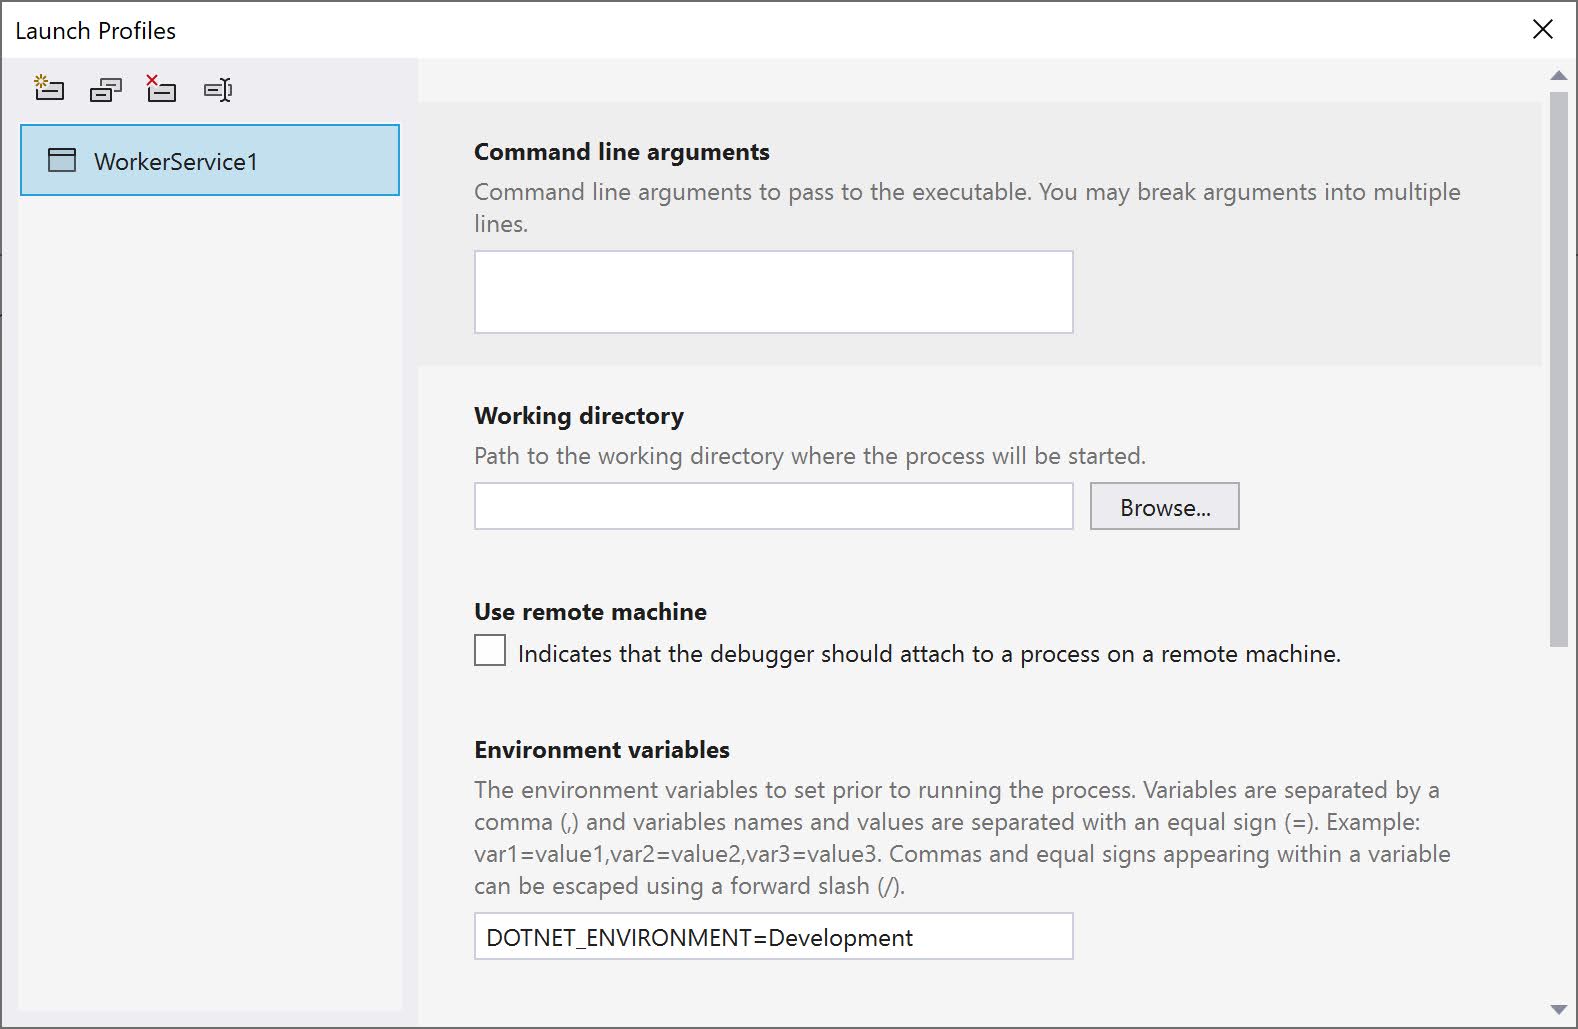
    This will open the Launch Profiles UI:

    Here you can update the ASPNETCORE_ENVIRONMENT environment variable to update the environment.

    Behind the scenes this will update your launchsettings.json file:

    DOTNET_ENVIRONMENT

    But what if you want to do the same thing in a .NET Core console application? If you are using the .NET Core Worker template, you can do almost the same thing with only one big difference; instead of setting the ASPNETCORE_ENVIRONMENT variable, you should set the DOTNET_ENVIRONMENT environment variable.

    And here is the related launchsettings.json file:

    Remark: Using the DOTNET_ENVIRONMENT variable also works for ASP.NET Core applications.

    More information: https://docs.microsoft.com/en-us/aspnet/core/fundamentals/environments?view=aspnetcore-6.0

    Popular posts from this blog

    Podman– Command execution failed with exit code 125

    After updating WSL on one of the developer machines, Podman failed to work. When we took a look through Podman Desktop, we noticed that Podman had stopped running and returned the following error message: Error: Command execution failed with exit code 125 Here are the steps we tried to fix the issue: We started by running podman info to get some extra details on what could be wrong: >podman info OS: windows/amd64 provider: wsl version: 5.3.1 Cannot connect to Podman. Please verify your connection to the Linux system using `podman system connection list`, or try `podman machine init` and `podman machine start` to manage a new Linux VM Error: unable to connect to Podman socket: failed to connect: dial tcp 127.0.0.1:2655: connectex: No connection could be made because the target machine actively refused it. That makes sense as the podman VM was not running. Let’s check the VM: >podman machine list NAME         ...

    Azure DevOps/ GitHub emoji

    I’m really bad at remembering emoji’s. So here is cheat sheet with all emoji’s that can be used in tools that support the github emoji markdown markup: All credits go to rcaviers who created this list.

    VS Code Planning mode

    After the introduction of Plan mode in Visual Studio , it now also found its way into VS Code. Planning mode, or as I like to call it 'Hannibal mode', extends GitHub Copilot's Agent Mode capabilities to handle larger, multi-step coding tasks with a structured approach. Instead of jumping straight into code generation, Planning mode creates a detailed execution plan. If you want more details, have a look at my previous post . Putting plan mode into action VS Code takes a different approach compared to Visual Studio when using plan mode. Instead of a configuration setting that you can activate but have limited control over, planning is available as a separate chat mode/agent: I like this approach better than how Visual Studio does it as you have explicit control when plan mode is activated. Instead of immediately diving into execution, the plan agent creates a plan and asks some follow up questions: You can further edit the plan by clicking on ‘Open in Editor’: ...