
Import a .pfx file at build time

For our desktop applications (WPF and even Winforms), we are still using ClickOnce. Although the technology is rather old, it still serves our needs.

An important part to securely deploy our applications through ClickOnce is signing the application and the deployment manifest using a public/private key pair. During local development, you can use a PFX file and select it on the Signing tab for your project.

If you build the project for the first time and you didn’t provide the PFX password yet, you get an error like this:

C:\Program Files (x86)\Microsoft Visual Studio\2022\BuildTools\MSBuild\Current\Bin\Microsoft.Common.CurrentVersion.targets(3476,5): Error MSB3326: Cannot import the following key file: . The key file may be password protected. To correct this, try to import the certificate again or import the certificate manually into the current user’s personal certificate store.

C:\Program Files (x86)\Microsoft Visual Studio\2022\BuildTools\MSBuild\Current\Bin\Microsoft.Common.CurrentVersion.targets(3476,5): Error MSB3321: Importing key file "2023.pfx" was canceled.

However on the build server, this manual action is of course not a good solution.

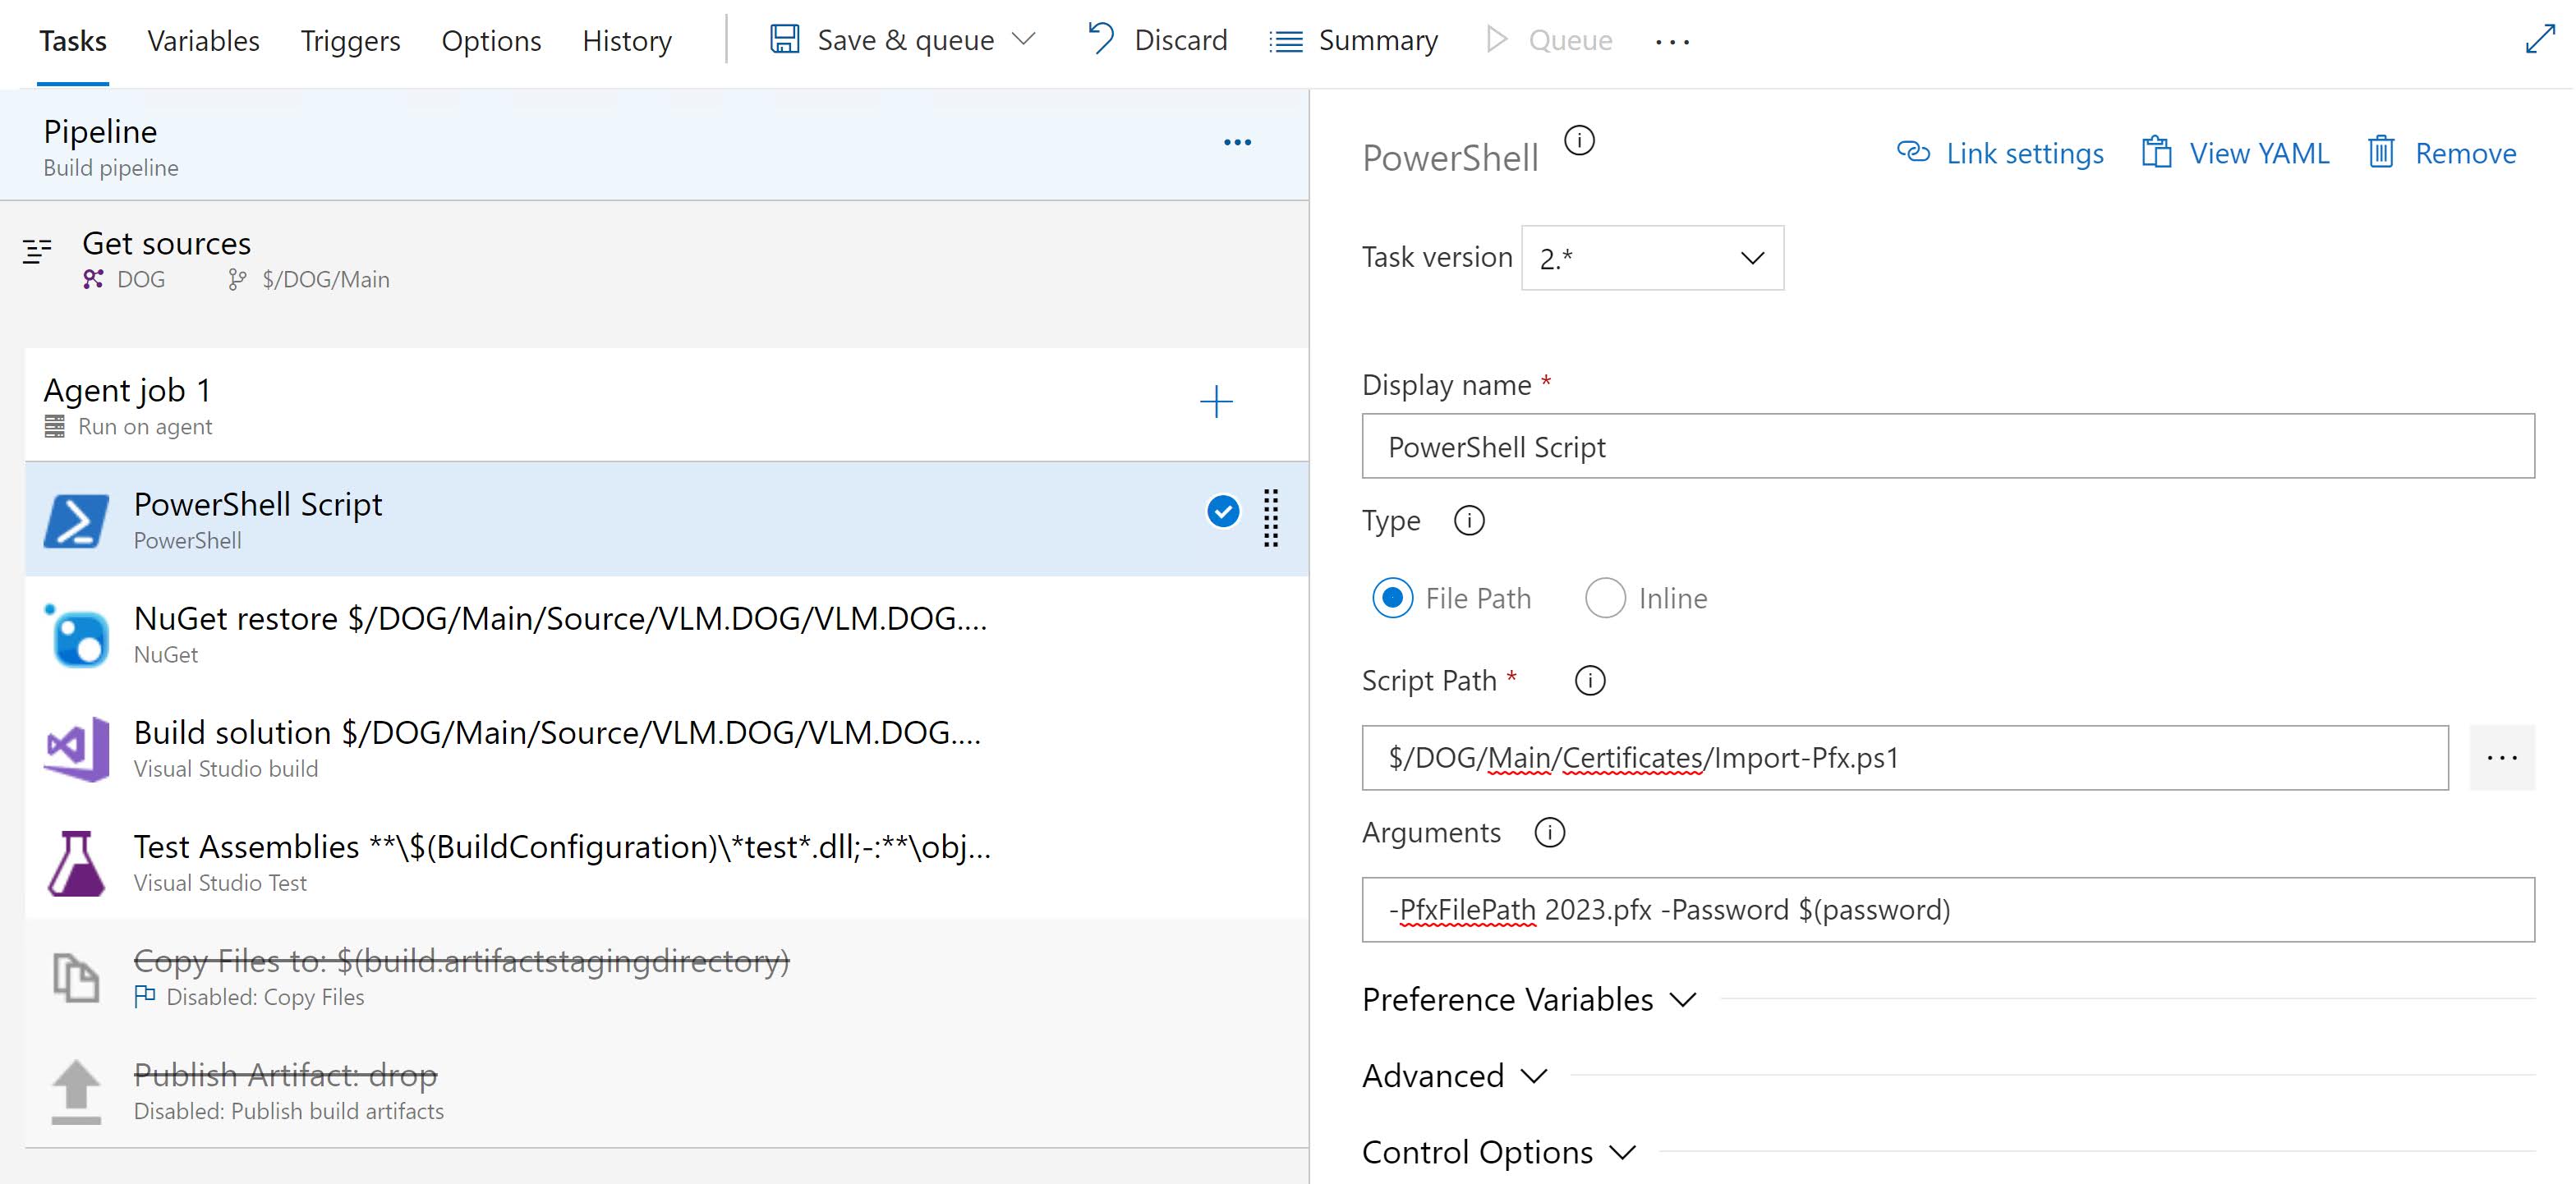
Import the .pfx file on the build server

First we need to check in our pfx file into source control. Once that is done, also add the import-pfx Powershell script to source control:

Now we are good to go and can update our build script. We create a new Powershell task and invoke our script before building the ClickOnce application:

Popular posts from this blog

Azure DevOps/ GitHub emoji

I’m really bad at remembering emoji’s. So here is cheat sheet with all emoji’s that can be used in tools that support the github emoji markdown markup: All credits go to rcaviers who created this list.

Kubernetes–Limit your environmental impact

Reducing the carbon footprint and CO2 emission of our (cloud) workloads, is a responsibility of all of us. If you are running a Kubernetes cluster, have a look at Kube-Green . kube-green is a simple Kubernetes operator that automatically shuts down (some of) your pods when you don't need them. A single pod produces about 11 Kg CO2eq per year( here the calculation). Reason enough to give it a try! Installing kube-green in your cluster The easiest way to install the operator in your cluster is through kubectl. We first need to install a cert-manager: kubectl apply -f https://github.com/cert-manager/cert-manager/releases/download/v1.14.5/cert-manager.yaml Remark: Wait a minute before you continue as it can take some time before the cert-manager is up & running inside your cluster. Now we can install the kube-green operator: kubectl apply -f https://github.com/kube-green/kube-green/releases/latest/download/kube-green.yaml Now in the namespace where we want t...

Podman– Command execution failed with exit code 125

After updating WSL on one of the developer machines, Podman failed to work. When we took a look through Podman Desktop, we noticed that Podman had stopped running and returned the following error message: Error: Command execution failed with exit code 125 Here are the steps we tried to fix the issue: We started by running podman info to get some extra details on what could be wrong: >podman info OS: windows/amd64 provider: wsl version: 5.3.1 Cannot connect to Podman. Please verify your connection to the Linux system using `podman system connection list`, or try `podman machine init` and `podman machine start` to manage a new Linux VM Error: unable to connect to Podman socket: failed to connect: dial tcp 127.0.0.1:2655: connectex: No connection could be made because the target machine actively refused it. That makes sense as the podman VM was not running. Let’s check the VM: >podman machine list NAME         ...