While browsing through Github, I discovered the following project: Data API builder for Azure Databases(DAB).
With data API builder, database objects can be exposed via REST or GraphQL endpoints so that your data can be accessed using modern techniques on any platform, any language, and any device. With an integrated and flexible policy engine, native support for common behavior like pagination, filtering, projection and sorting, the creation of CRUD backend services can be done in minutes instead of hours or days, giving developers an efficiency boost like never seen before.

Sounds cool and a perfect fit for a small application where you only need an API to expose some data. Let’s give it a try!
Setup
Data API builder provides a CLI tool to help us with the configuration and the setup of our project.
Install the tool using the following command:
dotnet tool install --global Microsoft.DataApiBuilder

Now that the tool is installed successfully, we need to create a configuration file specifying our connectionstring to the database we want to connect to.
Remark: We can connect to both (Azure) SQL Server, Azure CosmosDB, Azure MySQL and Azure PostgreSQL.
Run the dab init command to generate our config file:
dab init --database-type "mssql" --connection-string "Server=localhost;Database=<database-name>;User ID=<user>;Password=<password>;TrustServerCertificate=true" --host-mode "Development"
This will create a new config file looking like this:
Exposing tables
Now that the basic setup is done, we can start specifying which entities we want to expose.
Therefore we need to run the dab add command:
dab add Catalog --source dbo.catalog --permissions "anonymous:*"
This will update our config file with the following information:
Run our API
In fact, that is it. The only remaining thing we need to do is run our api:
dab start

Now we can query our API through both a REST and GraphQL endpoint. Of course I want to try the GraphQL endpoint(I used Postman in this example):
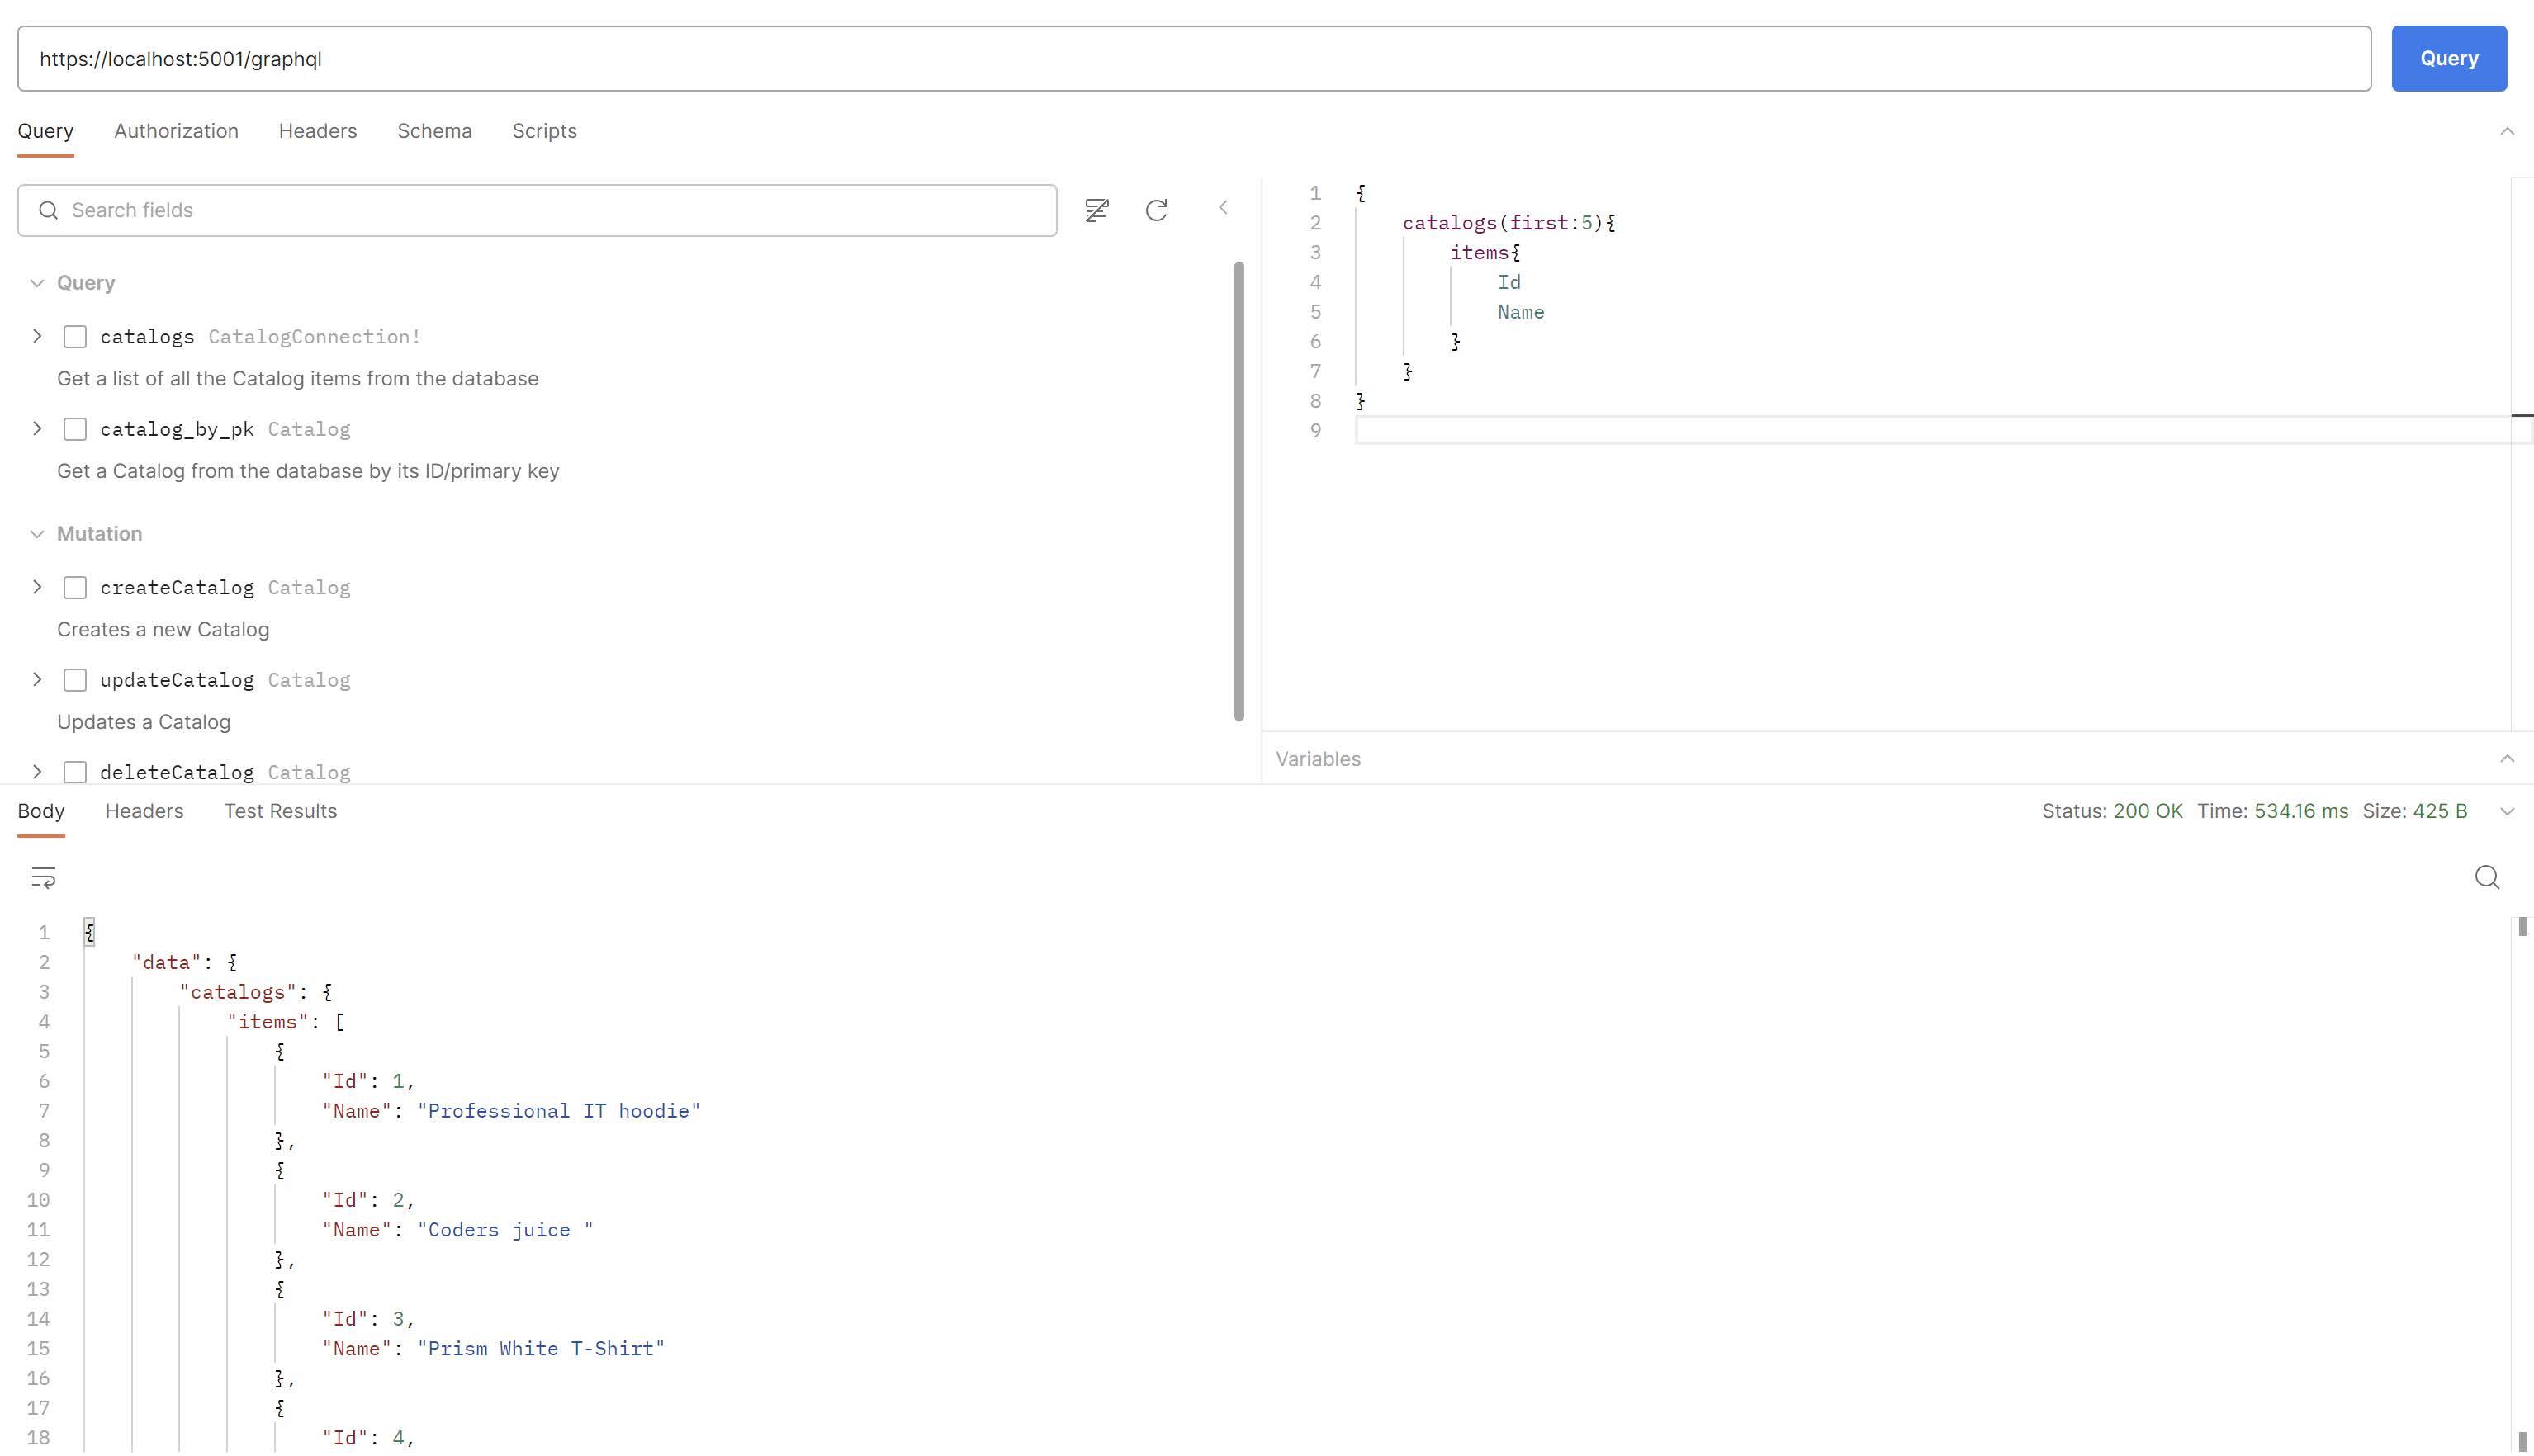
Love it!