
Running a Blazor WebAssembly App on Azure Static Web Apps

In my blog post yesterday I shared how I got into trouble when I tried to deploy a Blazor WebAssembly App to an Azure App Service for Linux. Turns out that this is not supported. However the documentation mentions that it should be possible using Azure Static Web Apps.

So far I didn’t use Azure Static Web Apps, this is a good opportunity to finally give it a try…

Create a Static Web App

  • Go to the Azure portal.
  • Select Create a Resource and search for Static Web Apps.
  • Select Static Web App.
  • Click on the Create Static Web App button or + Create if you already created a Static Web App before.

  • On the Basics tab, choose a Subscription, Static Web App name and hosting plan.

  • We also need to select a region for the Azure Functions API although we’ll not use it.

  • And now comes the important part, we have to choose a deployment option. In my case I have the code available on Azure DevOps, so let’s choose that option and specify all the other details that are required to connect to the correct Azure DevOps project, repository and branch.

  • Once we have done that, we choose Blazor from the Build presets dropdown, This will generate a YAML pipeline file optimized to deploy a Blazor application.

  • Click on Review+Create and afterwards on Create once the validation process completed succesfully.
  • Unfortunately this resulted in an error message:

  • This is because my Azure DevOps instance isn’t linked to an Azure Active Directory. I decided to follow the suggestion and switched to the Other option to finish the creation process.

    Deploy our Blazor app through Azure DevOps Pipelines

    As we couldn’t use the built-in configuration through the Portal, we have to create the Azure DevOps pipeline YAML file ourselves.

    • First go to the Static Web App we just created on the Azure Portal and click on Manage deployment token. Copy the token that is required to authenticate our pipeline.

    Now we need to open our Azure DevOps project and create our pipeline.

    • Open Azure DevOps and go to the correct project.
    • Go to Pipelines and choose Create pipeline. You can use the example YAML file below:
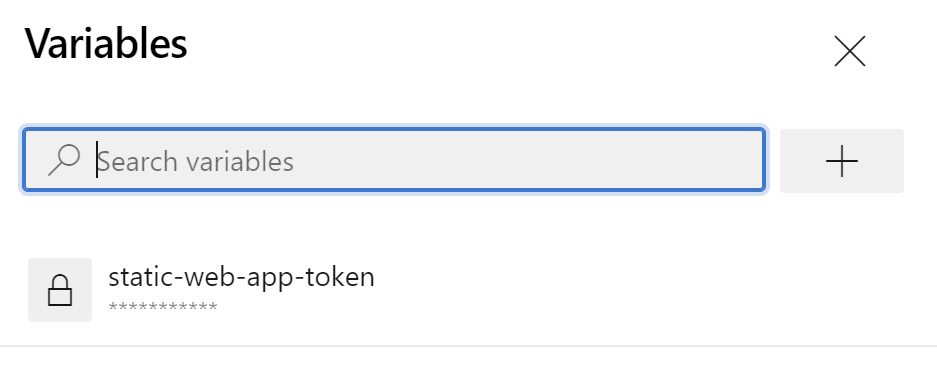
    • Create a new variable Static-Web-App-Token to store the deployment token:

    • If we now run the pipeline, Oryx will detect the application type and automatically compiles our source code into a runnable artifact.

    Let’s browse to our Static Web App to see if it is working:


    Popular posts from this blog

    Podman– Command execution failed with exit code 125

    After updating WSL on one of the developer machines, Podman failed to work. When we took a look through Podman Desktop, we noticed that Podman had stopped running and returned the following error message: Error: Command execution failed with exit code 125 Here are the steps we tried to fix the issue: We started by running podman info to get some extra details on what could be wrong: >podman info OS: windows/amd64 provider: wsl version: 5.3.1 Cannot connect to Podman. Please verify your connection to the Linux system using `podman system connection list`, or try `podman machine init` and `podman machine start` to manage a new Linux VM Error: unable to connect to Podman socket: failed to connect: dial tcp 127.0.0.1:2655: connectex: No connection could be made because the target machine actively refused it. That makes sense as the podman VM was not running. Let’s check the VM: >podman machine list NAME         ...

    Azure DevOps/ GitHub emoji

    I’m really bad at remembering emoji’s. So here is cheat sheet with all emoji’s that can be used in tools that support the github emoji markdown markup: All credits go to rcaviers who created this list.

    VS Code Planning mode

    After the introduction of Plan mode in Visual Studio , it now also found its way into VS Code. Planning mode, or as I like to call it 'Hannibal mode', extends GitHub Copilot's Agent Mode capabilities to handle larger, multi-step coding tasks with a structured approach. Instead of jumping straight into code generation, Planning mode creates a detailed execution plan. If you want more details, have a look at my previous post . Putting plan mode into action VS Code takes a different approach compared to Visual Studio when using plan mode. Instead of a configuration setting that you can activate but have limited control over, planning is available as a separate chat mode/agent: I like this approach better than how Visual Studio does it as you have explicit control when plan mode is activated. Instead of immediately diving into execution, the plan agent creates a plan and asks some follow up questions: You can further edit the plan by clicking on ‘Open in Editor’: ...