
Running a fully local AI Code Assistant with Continue–Part 3–Editing and Actions

In a previous posted I introduced you to Continue in combination with Ollama, as a way to run a fully local AI Code Assistant.

In a first post I showed you how to download and install the necessary models and how to integrate it inside VSCode.
A second post was focused on the configuration part (and a little bit of troubleshooting).

Today I want to continue by having a look at 2 other features; edit and actions.

Editing

The editing feature allows you to select a piece of text and describe how it should be changed. The nice thing about this feature is that you can use without leaving the code file or block you are working on.

Just select a piece of code and hit CTRL-I. We now get an Edit popup where can enter our prompt(or select an existing prompt):


Hit submit to get an answer back:

Now you get a list of suggested code changes that you can accept or reject:

Remark: Depending on the model you are using, the quality of the result can differ and also the waiting time can be largely different. I noticed it worked best when I kept the selected snippets small.

It feels somewhat similar to the inline chat functionality you get when using Github Copilot.

Actions

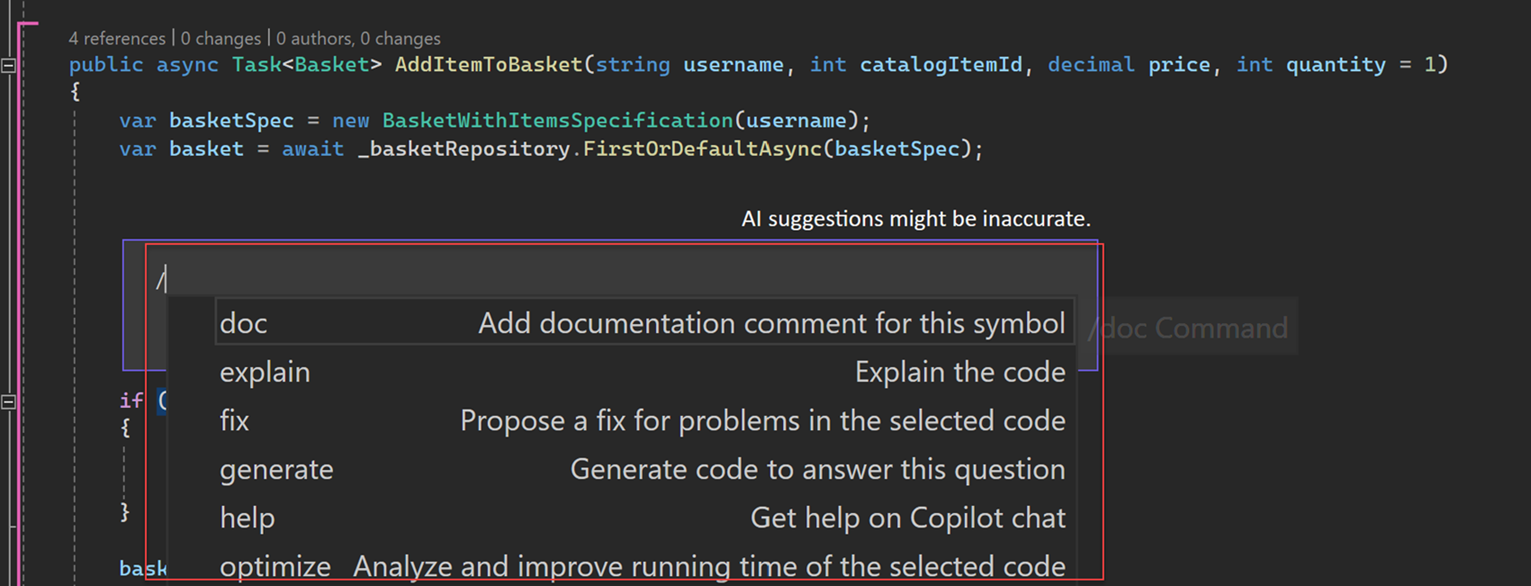
Actions allow you to invoke common use cases without having to write a full prompt. For example, creating a unit test, adding some documentation, …

To invoke an action type '/' and you get a list of available actions:

Select the action you want to execute from the dropdown and hit enter:

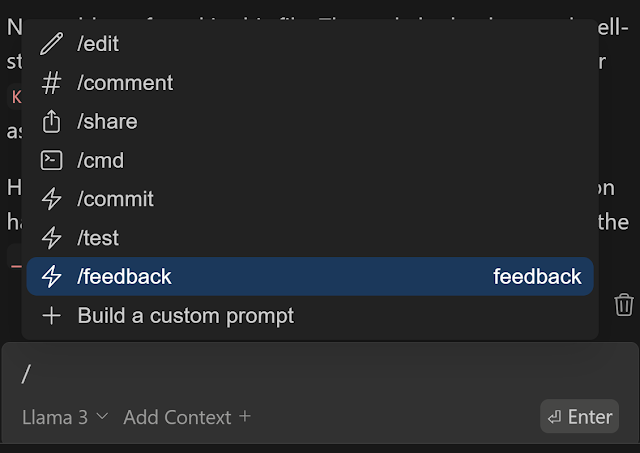
This feature can be found in Github Copilot as well as slash commands:

The nice thing in Continue is that you can easily create your own actions.

Therefore you need to take the following steps

  • Enter ‘/’ again and this time select Build a custom prompt:

  • A .prompts folder is created and a new prompt file is added. Change the name so that it matches the name you want to give the action.


If we now type ‘/’ again, our custom action becomes available:


Remark: I noticed that Continue sometimes didn’t immediately picks up the name change. In that case restarting VSCode helps.

Great! Let’s continue this series tomorrow. Already looking forward on what feature(s) we’ll discover then.

More information

Docs | Continue

https://devblogs.microsoft.com/visualstudio/mastering-slash-commands-with-github-copilot-in-visual-studio/

Popular posts from this blog

Azure DevOps/ GitHub emoji

I’m really bad at remembering emoji’s. So here is cheat sheet with all emoji’s that can be used in tools that support the github emoji markdown markup: All credits go to rcaviers who created this list.

Kubernetes–Limit your environmental impact

Reducing the carbon footprint and CO2 emission of our (cloud) workloads, is a responsibility of all of us. If you are running a Kubernetes cluster, have a look at Kube-Green . kube-green is a simple Kubernetes operator that automatically shuts down (some of) your pods when you don't need them. A single pod produces about 11 Kg CO2eq per year( here the calculation). Reason enough to give it a try! Installing kube-green in your cluster The easiest way to install the operator in your cluster is through kubectl. We first need to install a cert-manager: kubectl apply -f https://github.com/cert-manager/cert-manager/releases/download/v1.14.5/cert-manager.yaml Remark: Wait a minute before you continue as it can take some time before the cert-manager is up & running inside your cluster. Now we can install the kube-green operator: kubectl apply -f https://github.com/kube-green/kube-green/releases/latest/download/kube-green.yaml Now in the namespace where we want t...

Podman– Command execution failed with exit code 125

After updating WSL on one of the developer machines, Podman failed to work. When we took a look through Podman Desktop, we noticed that Podman had stopped running and returned the following error message: Error: Command execution failed with exit code 125 Here are the steps we tried to fix the issue: We started by running podman info to get some extra details on what could be wrong: >podman info OS: windows/amd64 provider: wsl version: 5.3.1 Cannot connect to Podman. Please verify your connection to the Linux system using `podman system connection list`, or try `podman machine init` and `podman machine start` to manage a new Linux VM Error: unable to connect to Podman socket: failed to connect: dial tcp 127.0.0.1:2655: connectex: No connection could be made because the target machine actively refused it. That makes sense as the podman VM was not running. Let’s check the VM: >podman machine list NAME         ...