
Azure DevOps Server - Switch from HTTP to HTTPS–Part 4

With the release of Azure DevOps Server 2022, I thought it would be a good time to finally make the switch to HTTPS for our internal Azure DevOps server. With the idea to minimize downtime, I decided to first introduce the HTTPS endpoint before upgrading the Azure DevOps server. But o boy, what I thought would be an easy task turned out to be quite a journey.

In part 1 I explained the steps that should be done at the server side, in part 2 I continued with an explanation of the changes done on the client side. In the third and what I thought would be the final part I had a look at the errors I got on the build server.

But here I'm back again with a fourth part, and yes I promise this will be the last one.

Although I thought I had fixed everything, I got another error when I tried to build an application(both in Visual Studio and through the Azure DevOps build pipeline). I first noticed the problem when building through Azure Pipelines, here is the error I got:

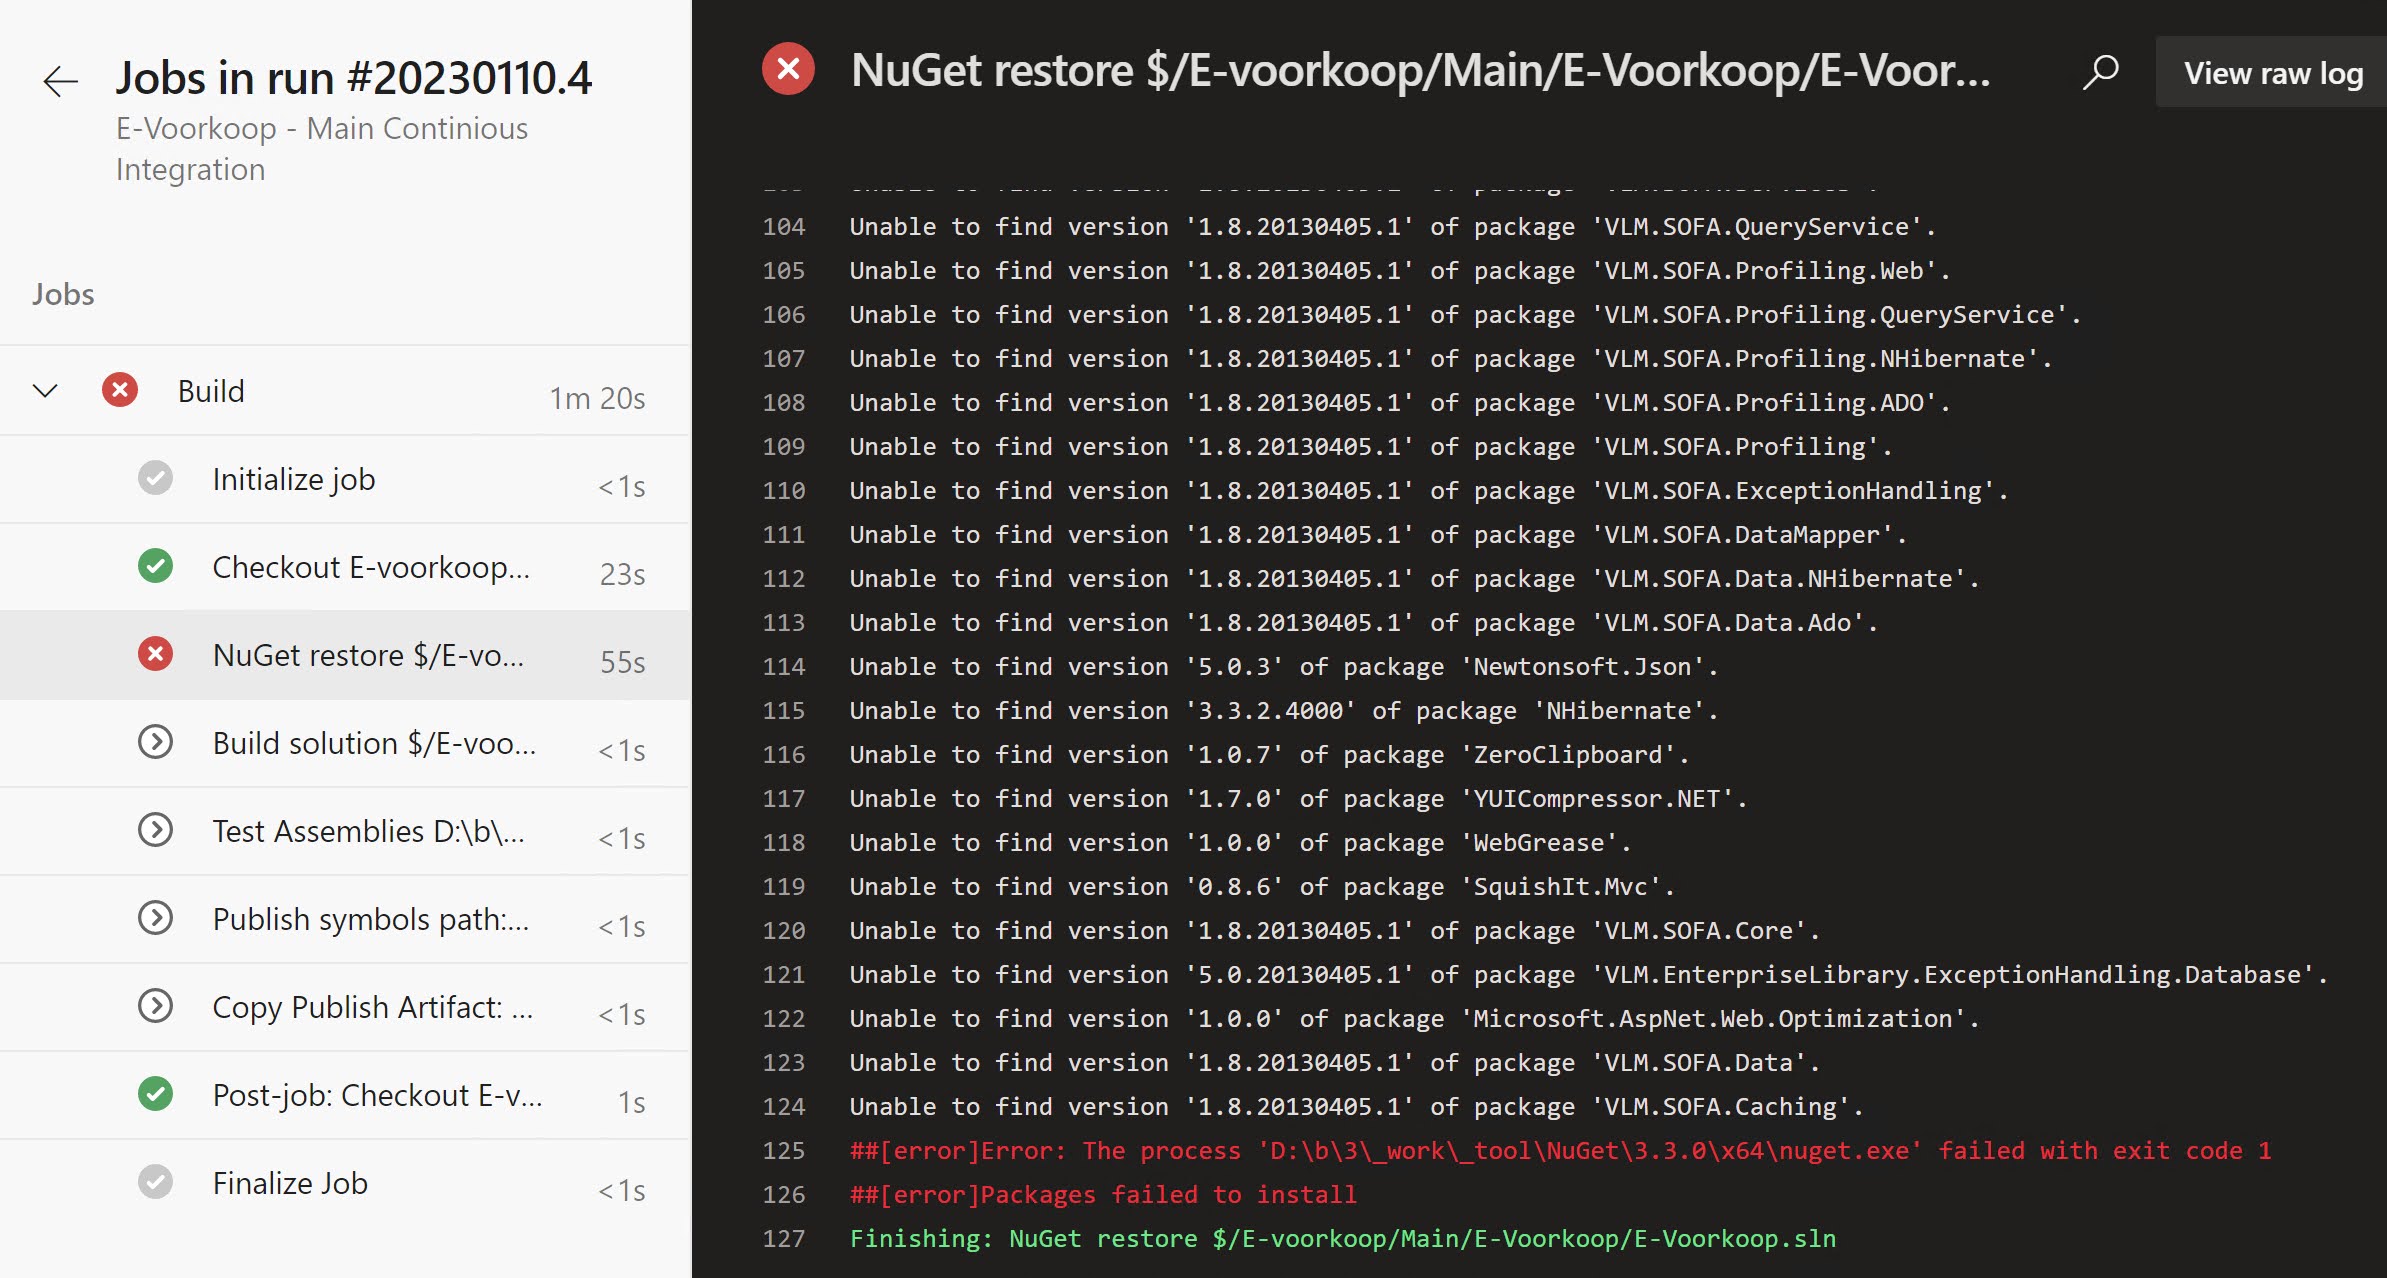
It seems that NuGet couldn’t find and restore the NuGet packages.

When I had a look at the beginning of the NuGet task it became quite obvious why:

The pipeline was still using the old http based Azure Artifact endpoint instead of the new https endpoint.

Ok, let’s see how we can fix this…

Updating the NuGet Package Source

If you got this error in your build pipeline, it probably means that you have configured your NuGet restore task with the ‘Feeds in my Nuget.config’ option:

As you know there are multiple ways you can specify the source of your NuGet packages and one of them is through a nuget.config file. Visual Studio will also use this file if it is found in your solution or project directory.

So to get rid of the error and be able to successfully restore our NuGet packages, we need to update our Nuget.config file to use our HTTPS endpoint:

Remark: Be aware that there is also a global Nuget.config file, it can be possible that you have your Package Source configured there. You can find this global Nuget.config file in the following location:

%AppData%\NuGet\NuGet.Config

If you need to update the list of Package Sources in Visual Studio, go to the Visual Studio Options --> NuGet Package Manager --> Package Sources and update the URL there:


Popular posts from this blog

Kubernetes–Limit your environmental impact

Reducing the carbon footprint and CO2 emission of our (cloud) workloads, is a responsibility of all of us. If you are running a Kubernetes cluster, have a look at Kube-Green . kube-green is a simple Kubernetes operator that automatically shuts down (some of) your pods when you don't need them. A single pod produces about 11 Kg CO2eq per year( here the calculation). Reason enough to give it a try! Installing kube-green in your cluster The easiest way to install the operator in your cluster is through kubectl. We first need to install a cert-manager: kubectl apply -f https://github.com/cert-manager/cert-manager/releases/download/v1.14.5/cert-manager.yaml Remark: Wait a minute before you continue as it can take some time before the cert-manager is up & running inside your cluster. Now we can install the kube-green operator: kubectl apply -f https://github.com/kube-green/kube-green/releases/latest/download/kube-green.yaml Now in the namespace where we want t...

Azure DevOps/ GitHub emoji

I’m really bad at remembering emoji’s. So here is cheat sheet with all emoji’s that can be used in tools that support the github emoji markdown markup: All credits go to rcaviers who created this list.

.NET 9 - Goodbye sln!

Although the csproj file evolved and simplified a lot over time, the Visual Studio solution file (.sln) remained an ugly file format full of magic GUIDs. With the latest .NET 9 SDK(9.0.200), we finally got an alternative; a new XML-based solution file(.slnx) got introduced in preview. So say goodbye to this ugly sln file: And meet his better looking slnx brother instead: To use this feature we first have to enable it: Go to Tools -> Options -> Environment -> Preview Features Check the checkbox next to Use Solution File Persistence Model Now we can migrate an existing sln file to slnx using the following command: dotnet sln migrate AICalculator.sln .slnx file D:\Projects\Test\AICalculator\AICalculator.slnx generated. Or create a new Visual Studio solution using the slnx format: dotnet new sln --format slnx The template "Solution File" was created successfully. The new format is not yet recognized by VSCode but it does work in Jetbr...