
Azure Pipelines–Templates–Part III

I'm currently migrating an existing CI/CD pipeline build in Azure DevOps from the ‘classic’ build approach to YAML files. I already talked about the concept of templates as a replacement for Task groups in the 'classic' pipeline and the multiple ways it can be used.

Before I finally shut up about templates(no promised made) I want to talk about one extra related feature I didn’t mention yet. One extra advantage that you get when you extend from a template (next to re-use) is that you can enforce a specific pipeline usage.

This can be done by introducing a Required template check.

Required template check

With the required template check, you can enforce pipelines to use a specific YAML template. When this check is in place, a pipeline will fail if it doesn't extend from the referenced template.

in your Azure DevOps project, go to the environment where you want to add the extra check.

Click on the ‘+’ sign to add a new approval.

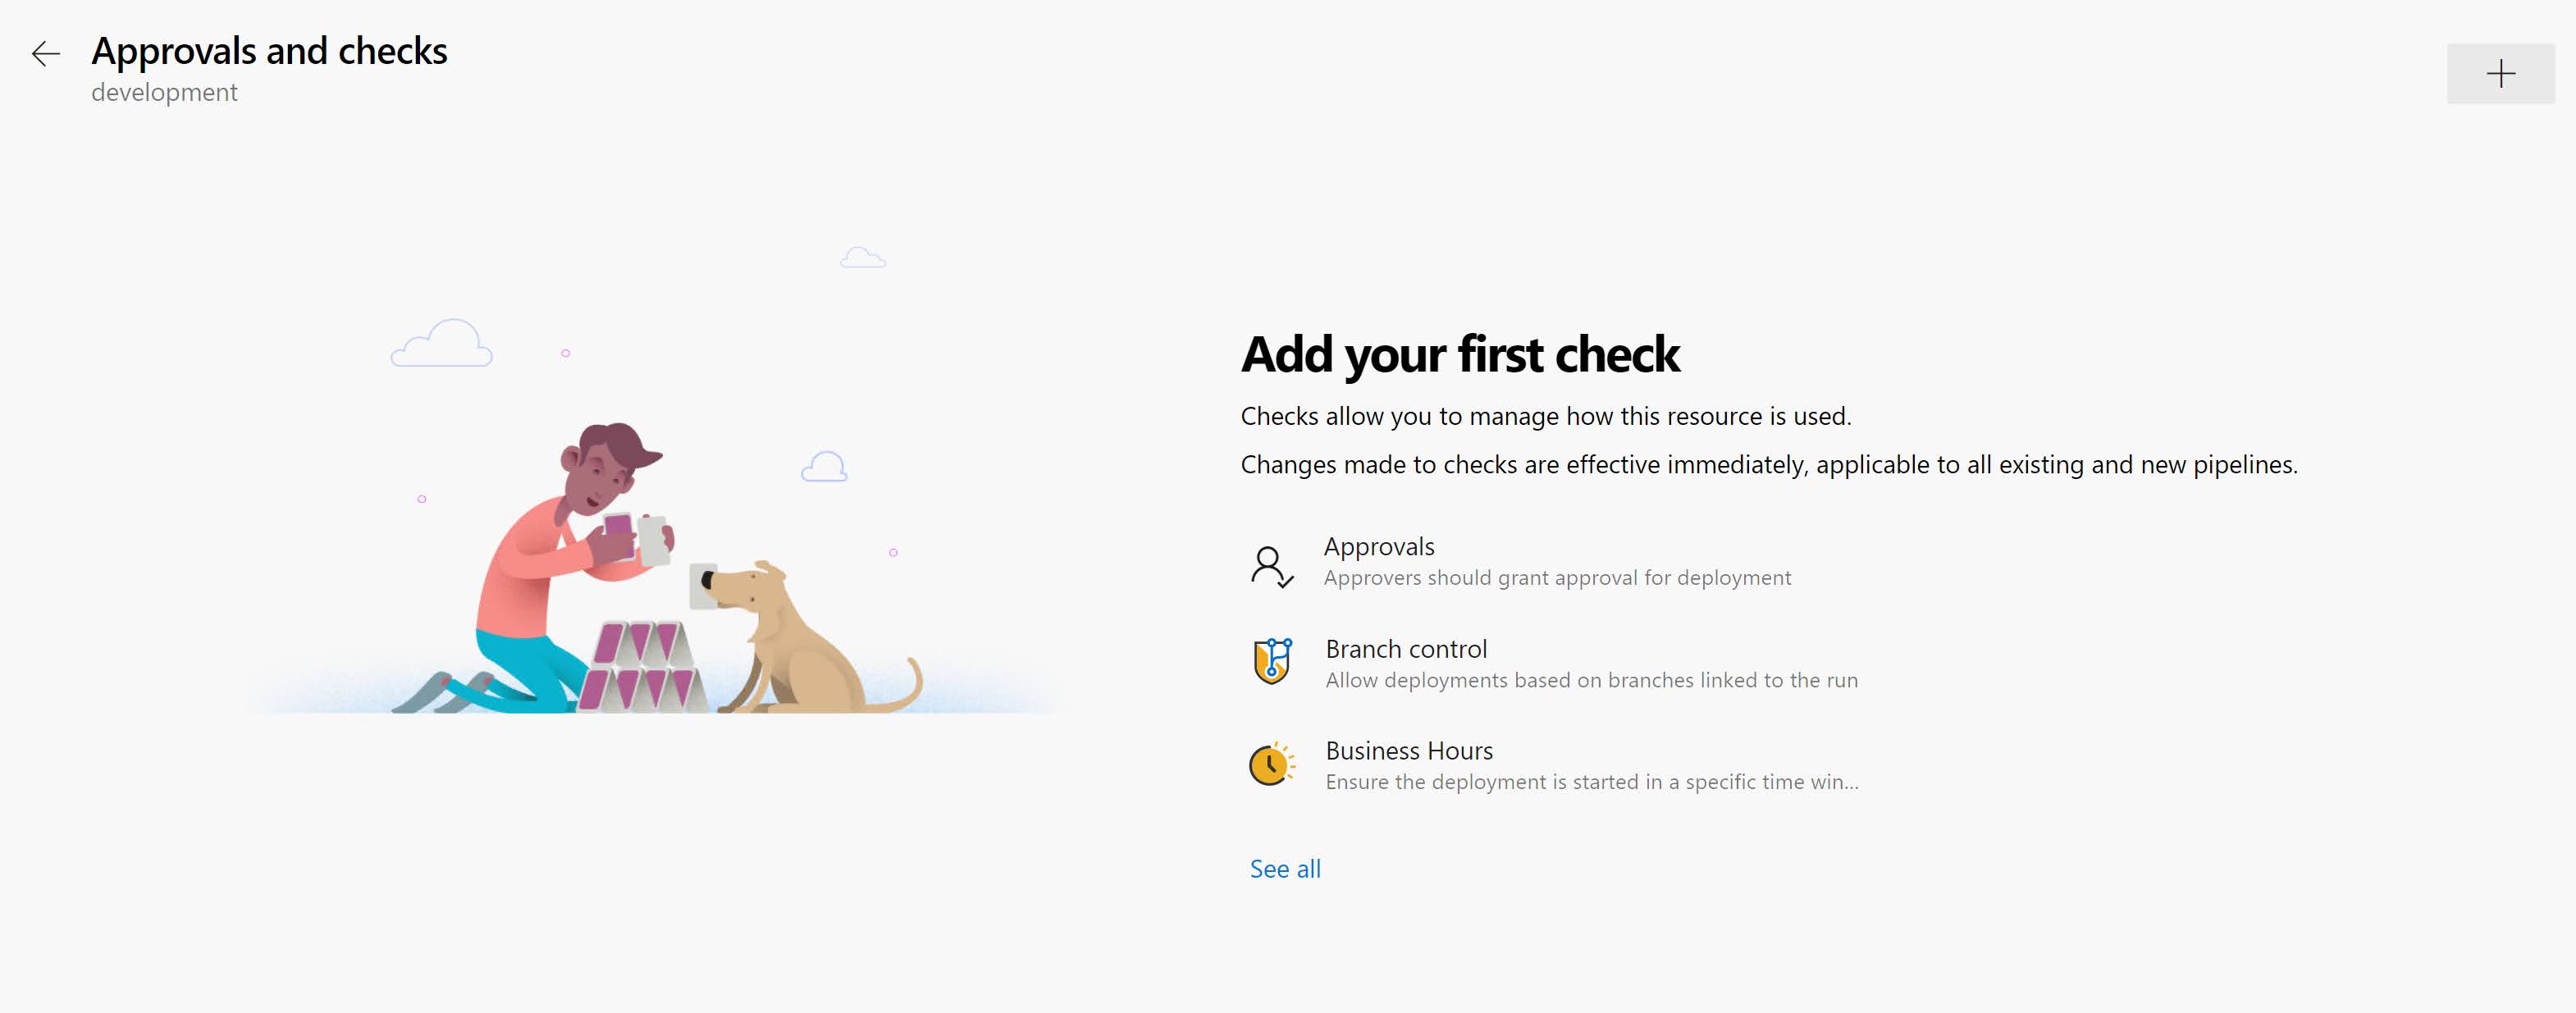
Select Required template from the list and click Next.

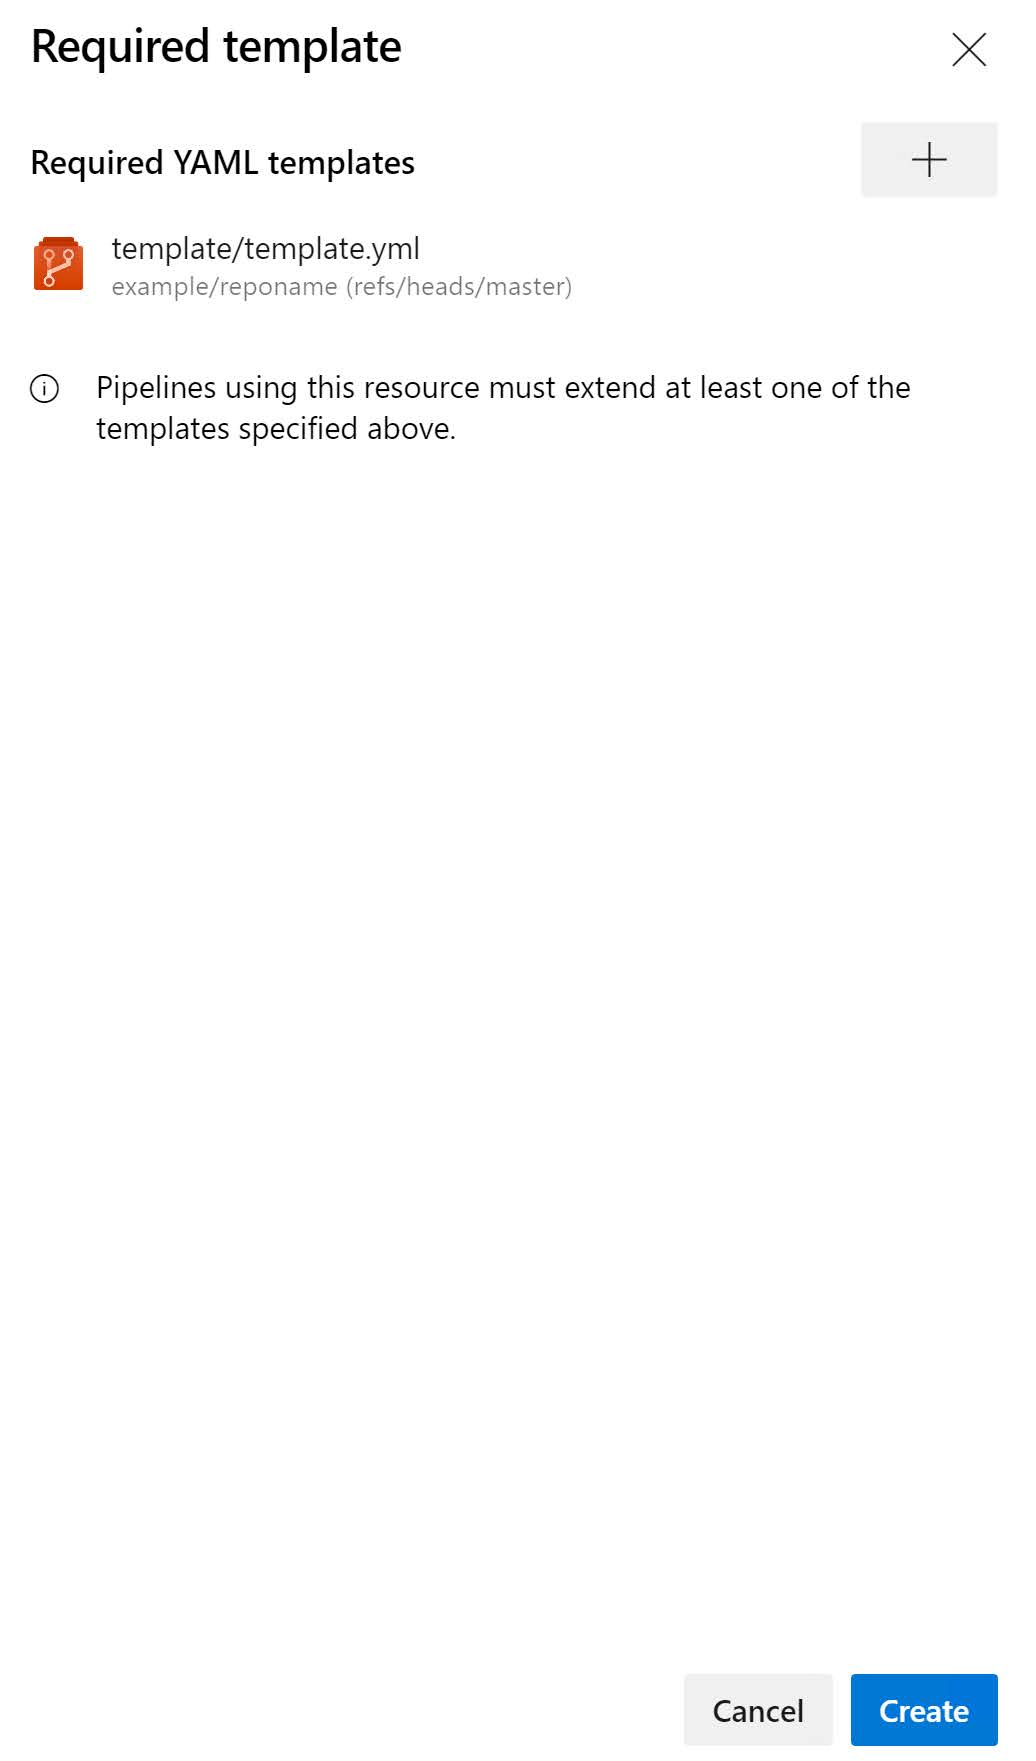
On the Required template screen, click on the ‘+’ sign to specify the required template.

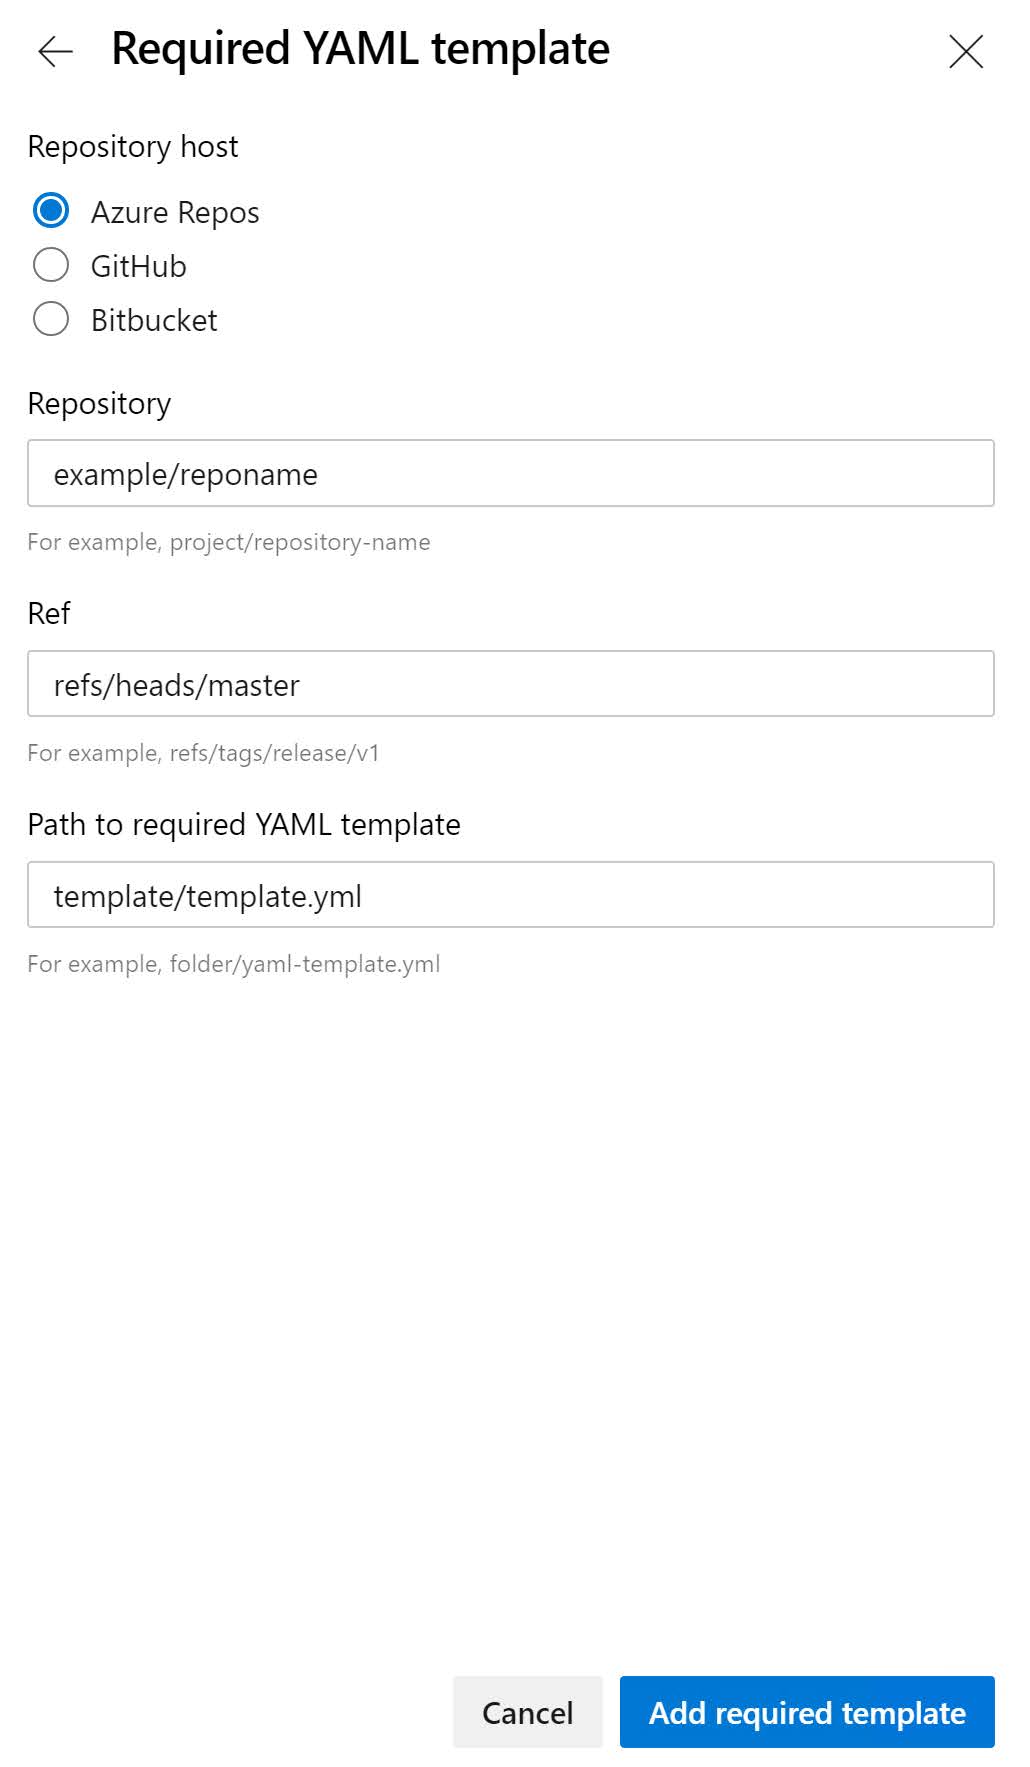
Now enter the details to get to your required template file.    

  • Repository type: The location of your repository (GitHub, Azure, or Bitbucket).
  • Repository: The name of your repository that contains your template.
  • Ref: The branch or tag of the required template.
  • Path to required template: The name of your template. 

Click on Add required template to add the template.

Remark: You can have multiple required templates for the same environment

Once you have selected your template, you can click Create to create the new check.

Now you are good to go!

Popular posts from this blog

Azure DevOps/ GitHub emoji

I’m really bad at remembering emoji’s. So here is cheat sheet with all emoji’s that can be used in tools that support the github emoji markdown markup: All credits go to rcaviers who created this list.

Kubernetes–Limit your environmental impact

Reducing the carbon footprint and CO2 emission of our (cloud) workloads, is a responsibility of all of us. If you are running a Kubernetes cluster, have a look at Kube-Green . kube-green is a simple Kubernetes operator that automatically shuts down (some of) your pods when you don't need them. A single pod produces about 11 Kg CO2eq per year( here the calculation). Reason enough to give it a try! Installing kube-green in your cluster The easiest way to install the operator in your cluster is through kubectl. We first need to install a cert-manager: kubectl apply -f https://github.com/cert-manager/cert-manager/releases/download/v1.14.5/cert-manager.yaml Remark: Wait a minute before you continue as it can take some time before the cert-manager is up & running inside your cluster. Now we can install the kube-green operator: kubectl apply -f https://github.com/kube-green/kube-green/releases/latest/download/kube-green.yaml Now in the namespace where we want t...

Podman– Command execution failed with exit code 125

After updating WSL on one of the developer machines, Podman failed to work. When we took a look through Podman Desktop, we noticed that Podman had stopped running and returned the following error message: Error: Command execution failed with exit code 125 Here are the steps we tried to fix the issue: We started by running podman info to get some extra details on what could be wrong: >podman info OS: windows/amd64 provider: wsl version: 5.3.1 Cannot connect to Podman. Please verify your connection to the Linux system using `podman system connection list`, or try `podman machine init` and `podman machine start` to manage a new Linux VM Error: unable to connect to Podman socket: failed to connect: dial tcp 127.0.0.1:2655: connectex: No connection could be made because the target machine actively refused it. That makes sense as the podman VM was not running. Let’s check the VM: >podman machine list NAME         ...