
Using GraphQL in Azure API Management–Part 2

We’ll continue our exploration of the GraphQL features in Azure API Management by having a look at another feature; the possibility to transform an existing SOAP or REST API in an GraphQL API(Synthetic GraphQL). (If you missed the previous post in this series, have a look here.) Let's walk through the steps.

The REST API

Let’s first have a look at our REST API that we’ll use in this post. I’ve created an Azure Function that can be called through a GET request and returns a Person object(similar to the GraphQL API I used in the previous post).

Here is the related code:

Create a Synthetic GraphQL API

Let’s see how we can expose this REST API as a ‘Synthetic GraphQL’ API through Azure API Management.

  • Go to your Azure API Management instance in the Azure portal.
  • From the side menu, select APIs in the APIs section:

  • Choose Synthetic GraphQL under Define a new API:

  • In the dialog box specify the following fields:
    • Display name: The name you want to use to recognize your API
    • Name: Autogenerated based on the display name
    • Schema file: The GraphQL schema that will be exposed through this endpoint
  • In this example, I’ll use the following GraphQL schema:
  • Click on Create to import the GraphQL schema.
  • After the API is imported you can browse the schema on the Design tab:

Of course right now there isn’t anything useful with this API as it isn’t linked to our existing REST API.  To change this, we have to create a set-graphql-resolver policy to map a field in the schema to an existing HTTP endpoint.

  • In the Backend processing section, select the Backend Policy code editor:

  • Configure the set-graphql-resolver policy to resolve our REST api using an HTTP data source:

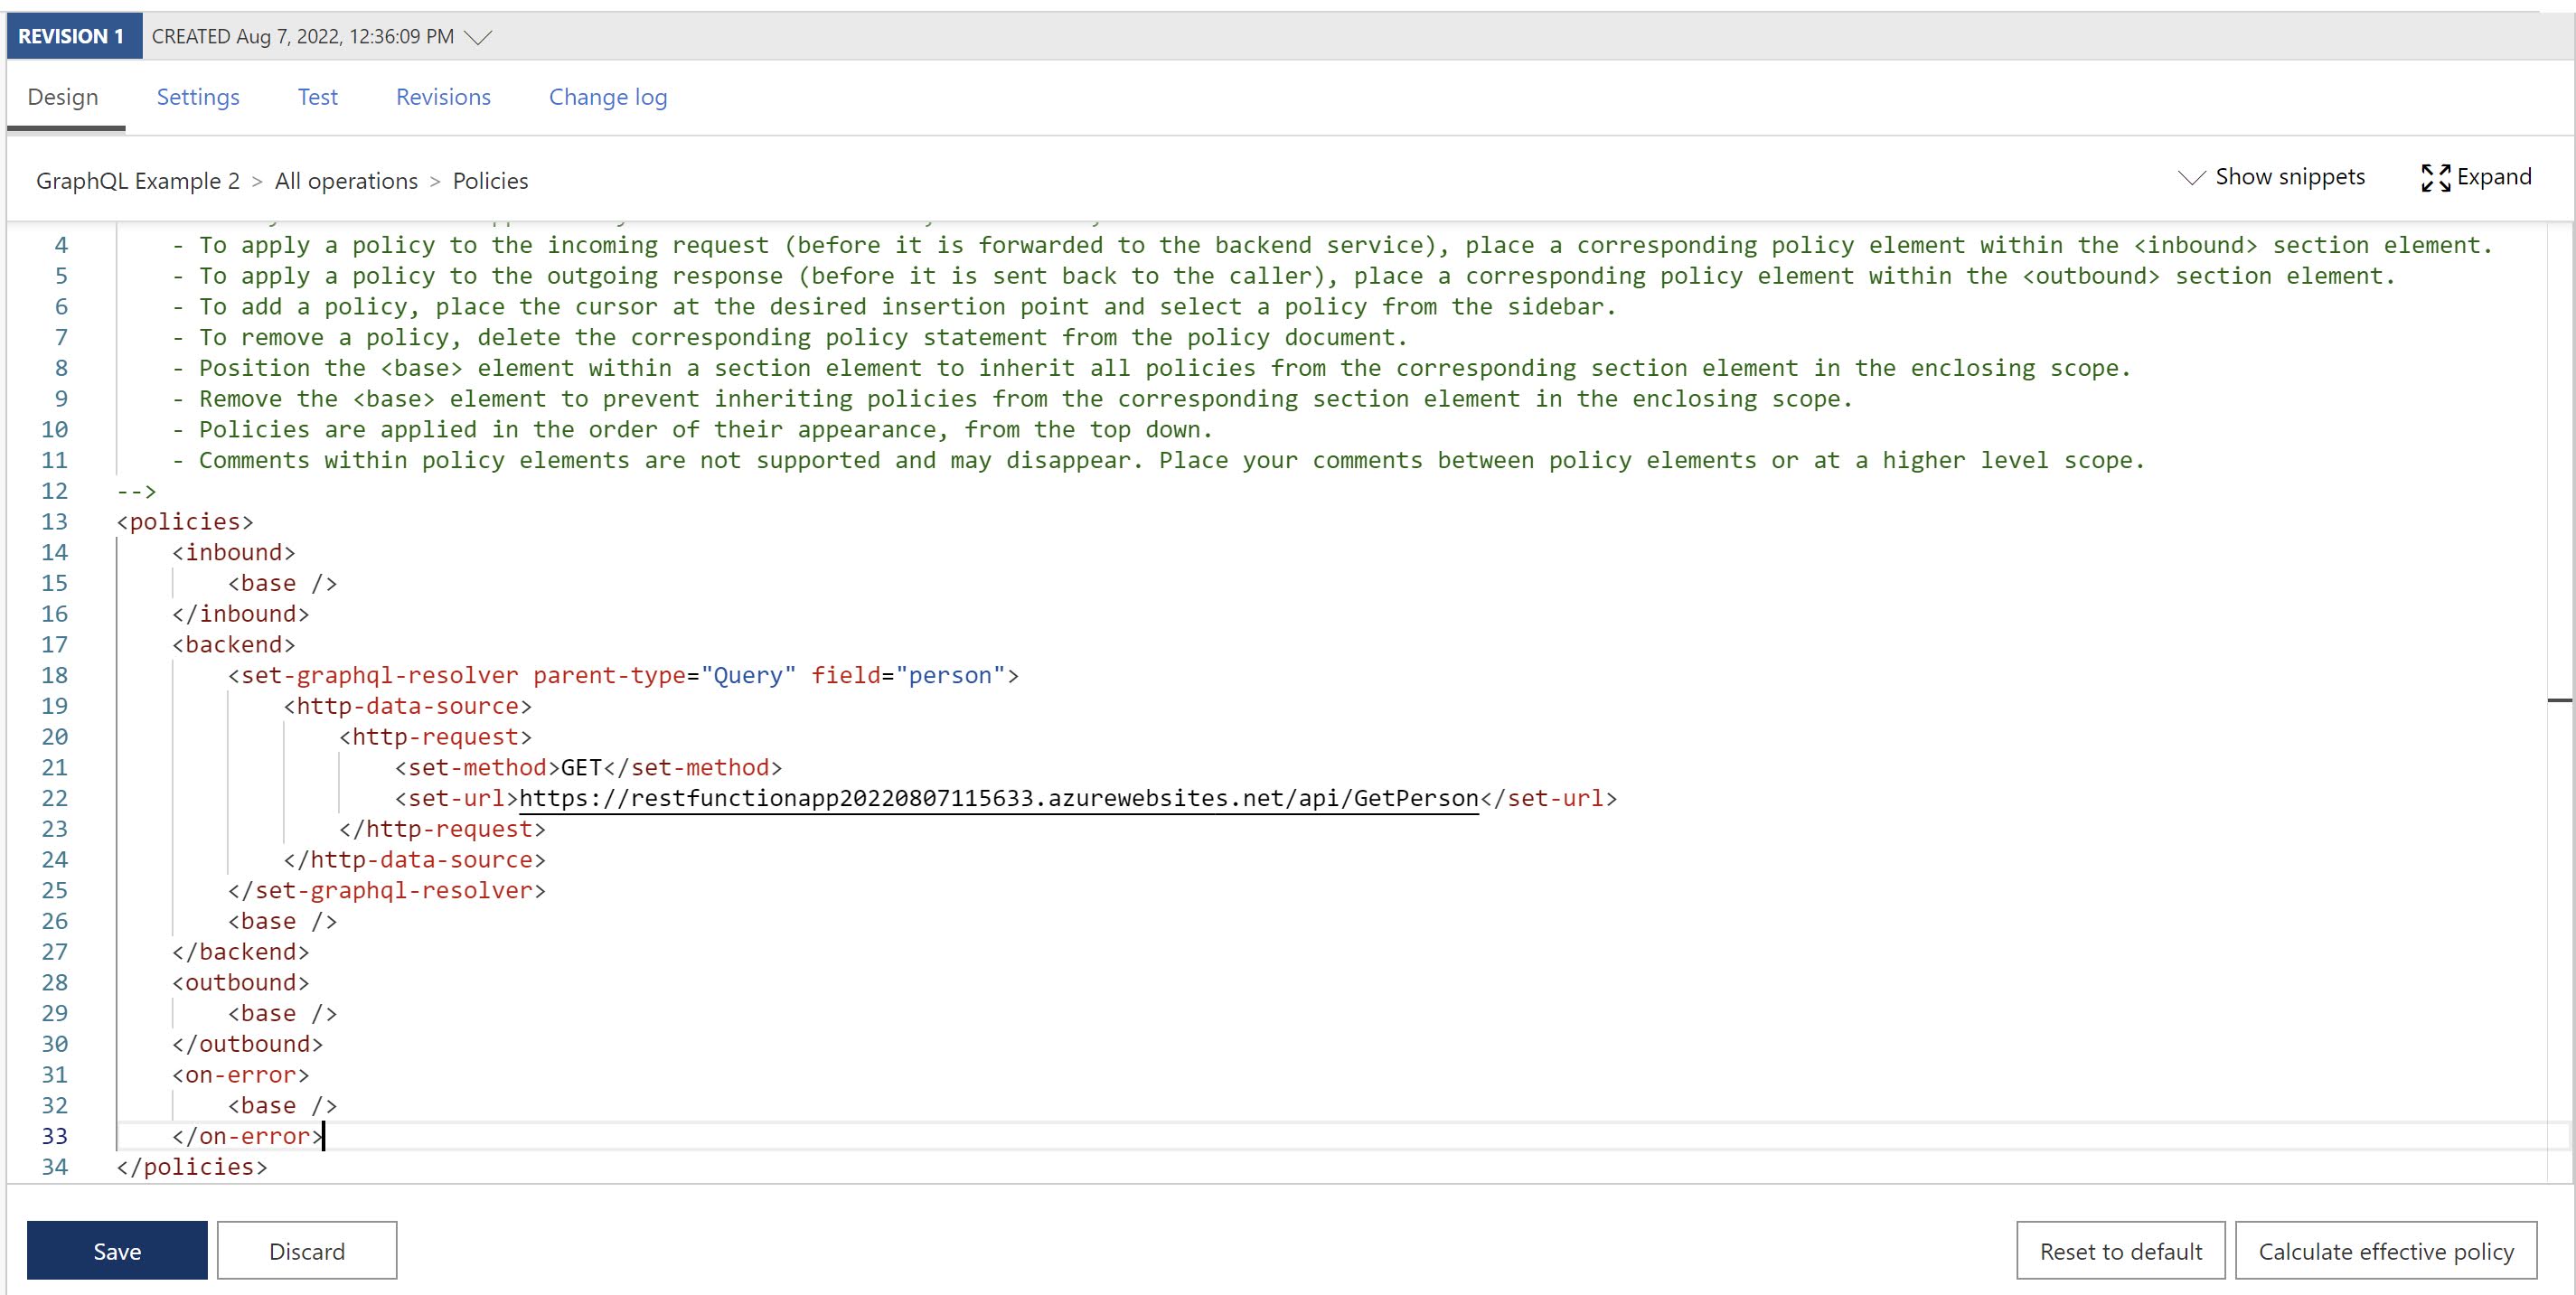
  • Click on Save to apply the policy.

  • To test our API endpoint, go to the Test tab. Select the fields you want to fetch or write your GraphQL query from scratch:

More information: https://docs.microsoft.com/en-us/azure/api-management/graphql-schema-resolve-api

Popular posts from this blog

Podman– Command execution failed with exit code 125

After updating WSL on one of the developer machines, Podman failed to work. When we took a look through Podman Desktop, we noticed that Podman had stopped running and returned the following error message: Error: Command execution failed with exit code 125 Here are the steps we tried to fix the issue: We started by running podman info to get some extra details on what could be wrong: >podman info OS: windows/amd64 provider: wsl version: 5.3.1 Cannot connect to Podman. Please verify your connection to the Linux system using `podman system connection list`, or try `podman machine init` and `podman machine start` to manage a new Linux VM Error: unable to connect to Podman socket: failed to connect: dial tcp 127.0.0.1:2655: connectex: No connection could be made because the target machine actively refused it. That makes sense as the podman VM was not running. Let’s check the VM: >podman machine list NAME         ...

Azure DevOps/ GitHub emoji

I’m really bad at remembering emoji’s. So here is cheat sheet with all emoji’s that can be used in tools that support the github emoji markdown markup: All credits go to rcaviers who created this list.

VS Code Planning mode

After the introduction of Plan mode in Visual Studio , it now also found its way into VS Code. Planning mode, or as I like to call it 'Hannibal mode', extends GitHub Copilot's Agent Mode capabilities to handle larger, multi-step coding tasks with a structured approach. Instead of jumping straight into code generation, Planning mode creates a detailed execution plan. If you want more details, have a look at my previous post . Putting plan mode into action VS Code takes a different approach compared to Visual Studio when using plan mode. Instead of a configuration setting that you can activate but have limited control over, planning is available as a separate chat mode/agent: I like this approach better than how Visual Studio does it as you have explicit control when plan mode is activated. Instead of immediately diving into execution, the plan agent creates a plan and asks some follow up questions: You can further edit the plan by clicking on ‘Open in Editor’: ...