
Using GraphQL in Azure API Management

If you are a regular reader of my blog, you know that I’m a big fan of GraphQL. Even Microsoft is jumping on the bandwagon and last year they announced support for GraphQL in Azure API Management.

Until recently I didn't had an opportunity to give it a try, but with the start of a new project, I could finally combine GraphQL and Azure API Management.

Import a GraphQL API

Let’s walk through the steps to import an existing GraphQL API backend and expose it through Azure API Management.

  • Go to your Azure API Management instance in the Azure portal.
  • From the side menu, select APIs in the APIs section:

  • Choose GraphQL under Define a new API:

  • In the dialog box specify the following fields:
    • Display name: The name you want to use to recognize your API
    • Name: Autogenerated based on the display name
    • GraphQL API endpoint: The endpoint URL where the GraphQL schema is available for download

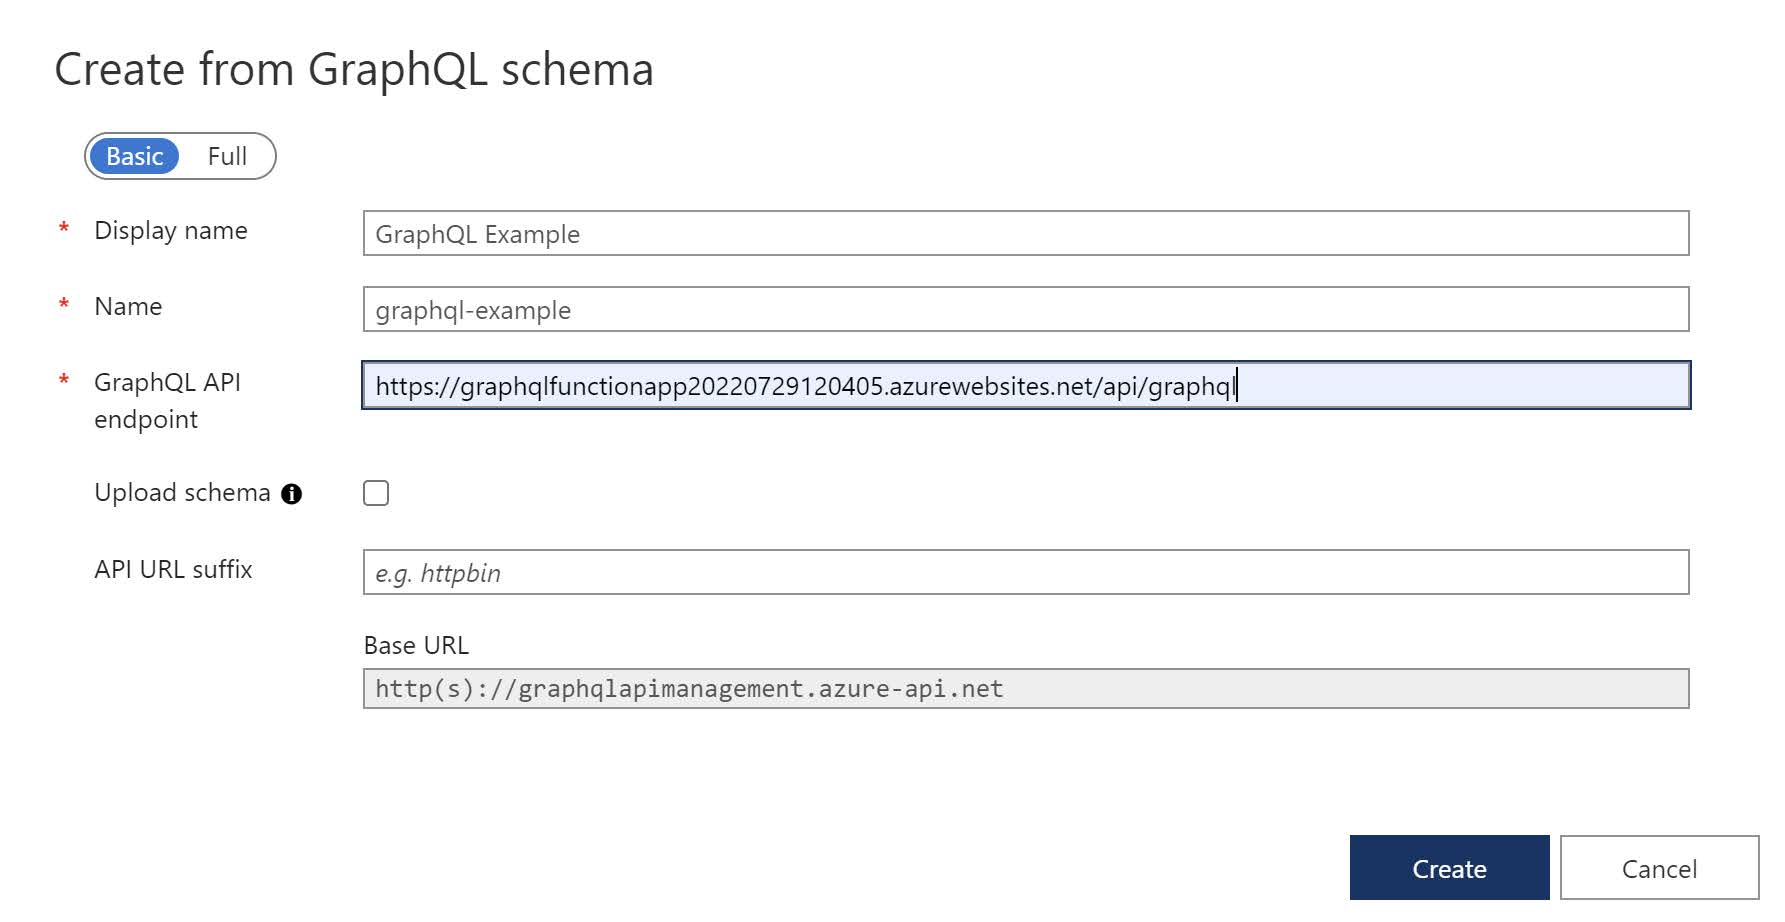
  • Click on Create to import the GraphQL api.
  • After the API is imported you can browse the schema on the Design tab:

  • To test our API endpoint, go to the Test tab. Select the fields you want to fetch or write your GraphQL query from scratch:

  • Click on Send to execute the query and view the returned response:

Next week, we’ll have a look at the other features that Azure API Management has to offer for GraphQL.

More information: https://docs.microsoft.com/en-us/azure/api-management/graphql-api

Popular posts from this blog

Azure DevOps/ GitHub emoji

I’m really bad at remembering emoji’s. So here is cheat sheet with all emoji’s that can be used in tools that support the github emoji markdown markup: All credits go to rcaviers who created this list.

Kubernetes–Limit your environmental impact

Reducing the carbon footprint and CO2 emission of our (cloud) workloads, is a responsibility of all of us. If you are running a Kubernetes cluster, have a look at Kube-Green . kube-green is a simple Kubernetes operator that automatically shuts down (some of) your pods when you don't need them. A single pod produces about 11 Kg CO2eq per year( here the calculation). Reason enough to give it a try! Installing kube-green in your cluster The easiest way to install the operator in your cluster is through kubectl. We first need to install a cert-manager: kubectl apply -f https://github.com/cert-manager/cert-manager/releases/download/v1.14.5/cert-manager.yaml Remark: Wait a minute before you continue as it can take some time before the cert-manager is up & running inside your cluster. Now we can install the kube-green operator: kubectl apply -f https://github.com/kube-green/kube-green/releases/latest/download/kube-green.yaml Now in the namespace where we want t...

Podman– Command execution failed with exit code 125

After updating WSL on one of the developer machines, Podman failed to work. When we took a look through Podman Desktop, we noticed that Podman had stopped running and returned the following error message: Error: Command execution failed with exit code 125 Here are the steps we tried to fix the issue: We started by running podman info to get some extra details on what could be wrong: >podman info OS: windows/amd64 provider: wsl version: 5.3.1 Cannot connect to Podman. Please verify your connection to the Linux system using `podman system connection list`, or try `podman machine init` and `podman machine start` to manage a new Linux VM Error: unable to connect to Podman socket: failed to connect: dial tcp 127.0.0.1:2655: connectex: No connection could be made because the target machine actively refused it. That makes sense as the podman VM was not running. Let’s check the VM: >podman machine list NAME         ...