
WebDeploy - EnableMsDeployAppOffline

At one of my customers we are using WebDeploy for years to deploy our web applications to IIS. Although not that well documented, it works great and has good Visual Studio integration.

When reviewing the release pipeline of one of my colleagues I noticed that they introduced tasks in the release pipeline to stop the application pool before deploying the package and start the application pool again once the deployment completed.

This is probably done because ASP.NET Core applications hosted in IIS run in-place and lock the files that they are running from. So if we don’t stop the application pool, web deploy will fail as it cannot replace these files.

Although this solution works, WebDeploy has a built-in alternative; the EnableMsDeployAppOffline flag.

When set to true this flag, WebDeploy will create an app_offline.htm file which unloads the running application, publishes files, then removes that file.

Sidenote: About app_offline.htm

The app_offline.htm is a long existing feature in IIS that can be used to shut own the Application Host and start it back up but without loading any of the modules and only serving the app_offline.htm file.It is an effective way to keep your site from running and showing a ‘busy’ or ‘not available’ message instead.  As long as this file is found in the root folder of your site no code will be run. Once the file gets deleted, the site starts back up.

When using the EnableMsDeployAppOffline flag, the app_offline.htm file is created for you by WebDeploy.

To use it through msbuild you need to add the following command line argument:

/p:EnableMSDeployAppOffline=true
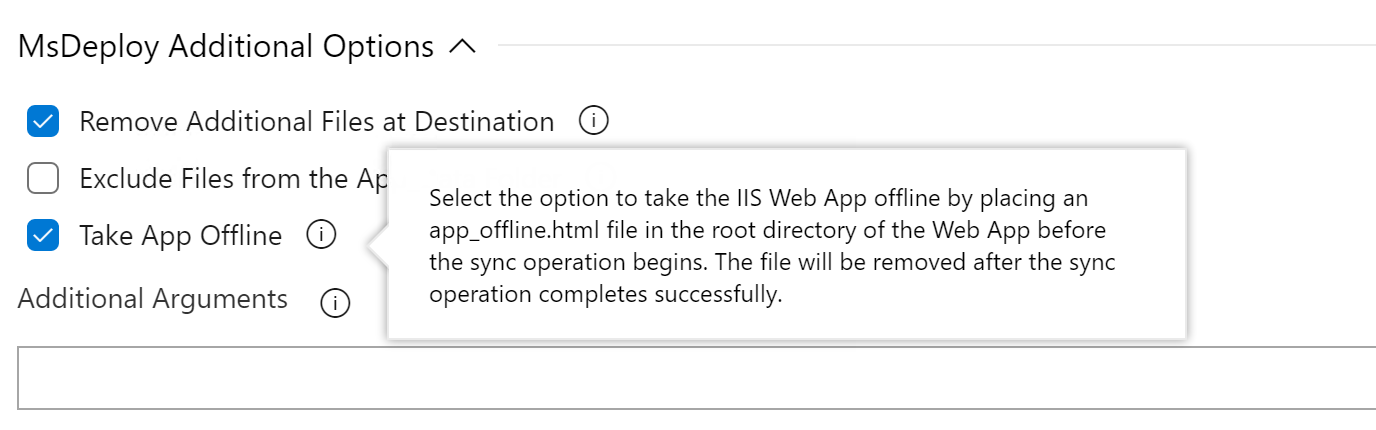
Or when using the WinRM – Web App Deployment tasks, you can set the Take App Offline flag:

Popular posts from this blog

Azure DevOps/ GitHub emoji

I’m really bad at remembering emoji’s. So here is cheat sheet with all emoji’s that can be used in tools that support the github emoji markdown markup: All credits go to rcaviers who created this list.

Kubernetes–Limit your environmental impact

Reducing the carbon footprint and CO2 emission of our (cloud) workloads, is a responsibility of all of us. If you are running a Kubernetes cluster, have a look at Kube-Green . kube-green is a simple Kubernetes operator that automatically shuts down (some of) your pods when you don't need them. A single pod produces about 11 Kg CO2eq per year( here the calculation). Reason enough to give it a try! Installing kube-green in your cluster The easiest way to install the operator in your cluster is through kubectl. We first need to install a cert-manager: kubectl apply -f https://github.com/cert-manager/cert-manager/releases/download/v1.14.5/cert-manager.yaml Remark: Wait a minute before you continue as it can take some time before the cert-manager is up & running inside your cluster. Now we can install the kube-green operator: kubectl apply -f https://github.com/kube-green/kube-green/releases/latest/download/kube-green.yaml Now in the namespace where we want t...

Podman– Command execution failed with exit code 125

After updating WSL on one of the developer machines, Podman failed to work. When we took a look through Podman Desktop, we noticed that Podman had stopped running and returned the following error message: Error: Command execution failed with exit code 125 Here are the steps we tried to fix the issue: We started by running podman info to get some extra details on what could be wrong: >podman info OS: windows/amd64 provider: wsl version: 5.3.1 Cannot connect to Podman. Please verify your connection to the Linux system using `podman system connection list`, or try `podman machine init` and `podman machine start` to manage a new Linux VM Error: unable to connect to Podman socket: failed to connect: dial tcp 127.0.0.1:2655: connectex: No connection could be made because the target machine actively refused it. That makes sense as the podman VM was not running. Let’s check the VM: >podman machine list NAME         ...