
Visual Studio Solution Filters

As I do a lot of software audits for customer, I encounter a large variation of codebases, some really small; a few projects, some really big; hundreds of projects in one solution.

The question is how can you avoid that Visual Studio becomes awfully slow when you have such a large solution? Enter Visual Studio Solution Filters…

What are Visual Studio Solution Filters?

Visual Studio Solution Filters allow you to selectively load a subset of the projects in a solution. Typically when working in a large solution you don’t need all projects. With a solution filter(.slnf) you can save a subset of projects that you want to load.

How to create a Visual Studio Solution Filter? 

Let’s share how to create a solution filter:

  • Open Visual Studio.
  • Click on the Open a project or solution option.

  • In the file dialog, select the solution you want to load. Don’t forget to check the Do not load projects checkbox in the bottom of the dialog before hitting Open.

  • The solution is opened without loading any of the projects.

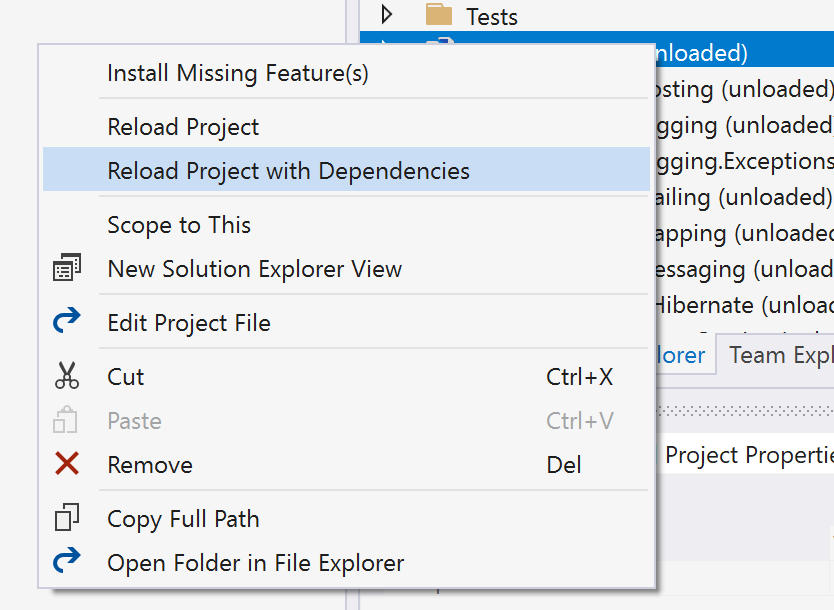
  • Right click on the projects you want to load and choose Reload project or Reload project with dependencies.

  • Once you are done loading the projects you need, you can save the solution filter by right clicking on the solution filed and choosing the Save as Solution filter option from the context menu.

Popular posts from this blog

Azure DevOps/ GitHub emoji

I’m really bad at remembering emoji’s. So here is cheat sheet with all emoji’s that can be used in tools that support the github emoji markdown markup: All credits go to rcaviers who created this list.

Kubernetes–Limit your environmental impact

Reducing the carbon footprint and CO2 emission of our (cloud) workloads, is a responsibility of all of us. If you are running a Kubernetes cluster, have a look at Kube-Green . kube-green is a simple Kubernetes operator that automatically shuts down (some of) your pods when you don't need them. A single pod produces about 11 Kg CO2eq per year( here the calculation). Reason enough to give it a try! Installing kube-green in your cluster The easiest way to install the operator in your cluster is through kubectl. We first need to install a cert-manager: kubectl apply -f https://github.com/cert-manager/cert-manager/releases/download/v1.14.5/cert-manager.yaml Remark: Wait a minute before you continue as it can take some time before the cert-manager is up & running inside your cluster. Now we can install the kube-green operator: kubectl apply -f https://github.com/kube-green/kube-green/releases/latest/download/kube-green.yaml Now in the namespace where we want t...

Podman– Command execution failed with exit code 125

After updating WSL on one of the developer machines, Podman failed to work. When we took a look through Podman Desktop, we noticed that Podman had stopped running and returned the following error message: Error: Command execution failed with exit code 125 Here are the steps we tried to fix the issue: We started by running podman info to get some extra details on what could be wrong: >podman info OS: windows/amd64 provider: wsl version: 5.3.1 Cannot connect to Podman. Please verify your connection to the Linux system using `podman system connection list`, or try `podman machine init` and `podman machine start` to manage a new Linux VM Error: unable to connect to Podman socket: failed to connect: dial tcp 127.0.0.1:2655: connectex: No connection could be made because the target machine actively refused it. That makes sense as the podman VM was not running. Let’s check the VM: >podman machine list NAME         ...